All photo materials are published with the kind permission of the author Filindr.
Part 1.
On the Internet I met a very good build model. It is interesting that the master who assemble this model lives thousands of kilometers from the sea and saw ships for the first time only in the early 90s of the last century.
His nickname is filindr, and his logo is an owl or, in Russian, an eagle owl.
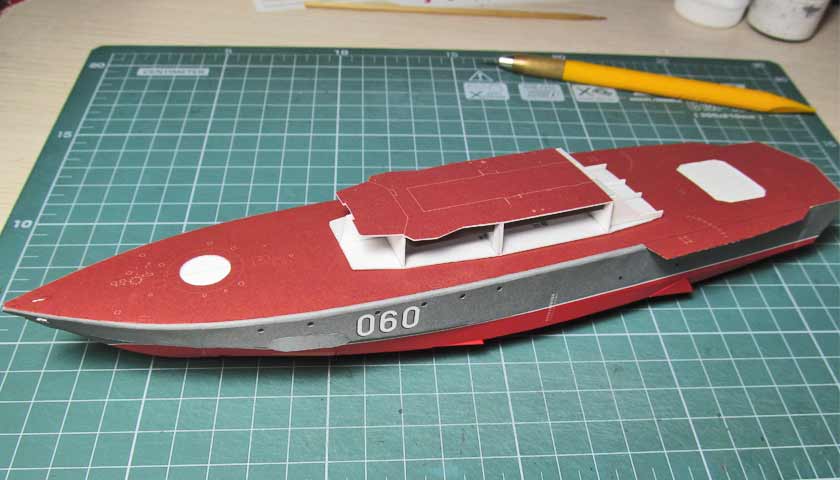
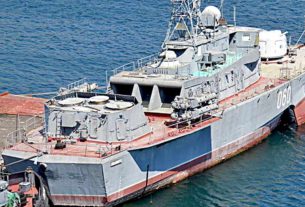
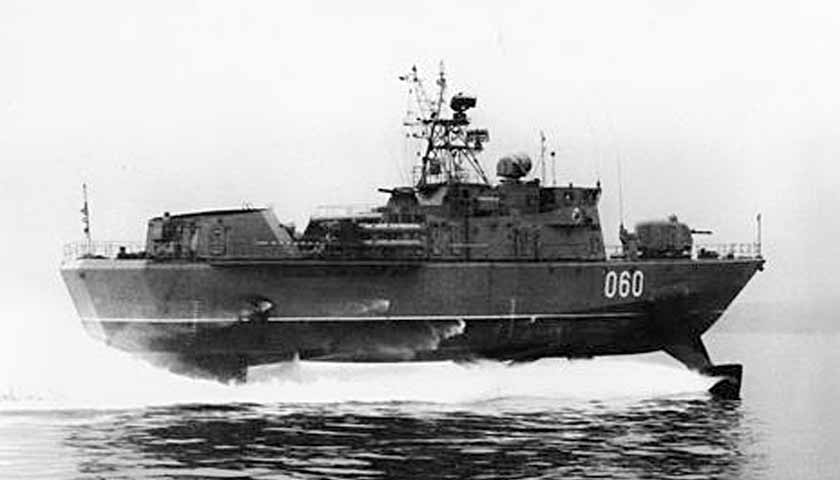
So I’m starting a story about the assembly of a small hydrofoil anti-submarine ship, which was designed shortly before the collapse of the USSR.

The model is assembled from an Ukrainian paper model magazine. Filinder starts his work with the model wireframe. I want to draw your attention to its accuracy and accuracy when assembling. The build quality of Filinder is almost perfect.


Draft sheathing of plain white paper is glued onto the ship’s frames.


The roughing skin is ready. The next step is to install niches for bow thrusters in the stern of the ship.

Filinder decided to make all the frames for the ship at once. In addition to the hull frame, he made the framework for the superstructures.


Then bow thrusters were made. These are two pipes with propellers. The thrusters pipes are located in the bow of the ship and are perpendicular to its diametrical plane.


Now it’s the turn of the upper deck.


After the deck, side parts are installed on the frames. The boards has a complex shape. In the upper part of the board there is a rounding going over to the deck. It is very difficult to make this form out of paper.


Next step is produsing and install of transom.


After the boards are followed by details of the bottom of the ship. Their shape is also very complex. It is necessary to give the completed shape to the details before gluing them into place.


Bow side cowles of hydrofoils.


Skin of bottom is ready to install.


Pay attention to the very complex junction of the two parts of the skin of the board in the bow of the ship. It is unfortunate that the master cut the details with scissors and the cut was not perfectly even. If Filinder had used the pattern, then the joint of the side parts could have turned out to be perfectly even. However, despite this, the overall impression of the model is excellent. It can be seen that the real master is working.

The logos are set on its places.


To be continued.