I present to you my French longboat’s transformation from 1:48 to 1:72 scale. This action requires the redevelopment of the longboat and order of its assembling technology.
Frames become in 0.8×0.8 mm strips and they lie on frame templates. It is rather difficulty describe, but easy to show:
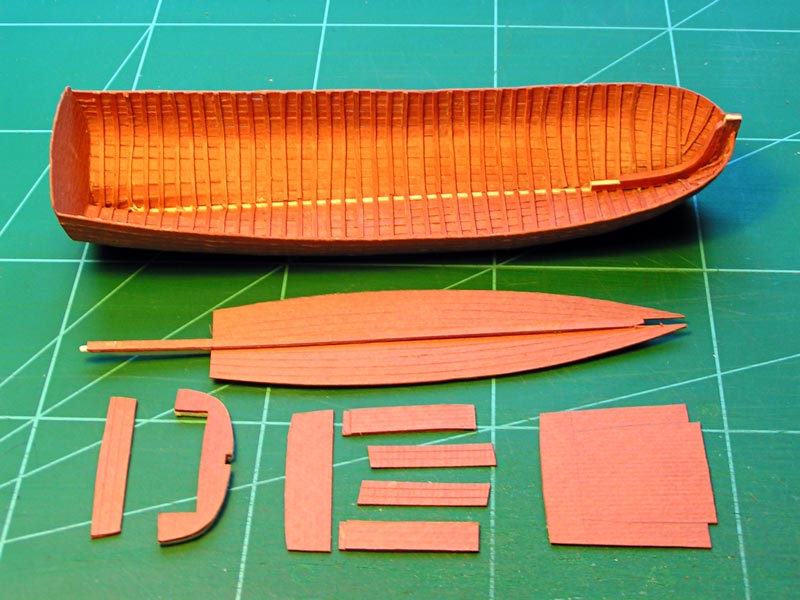
Patterns:
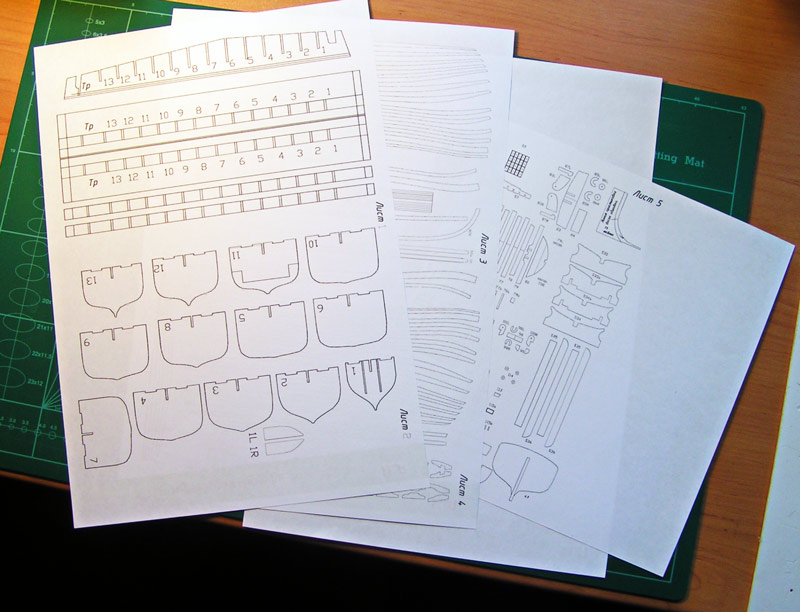
Details:
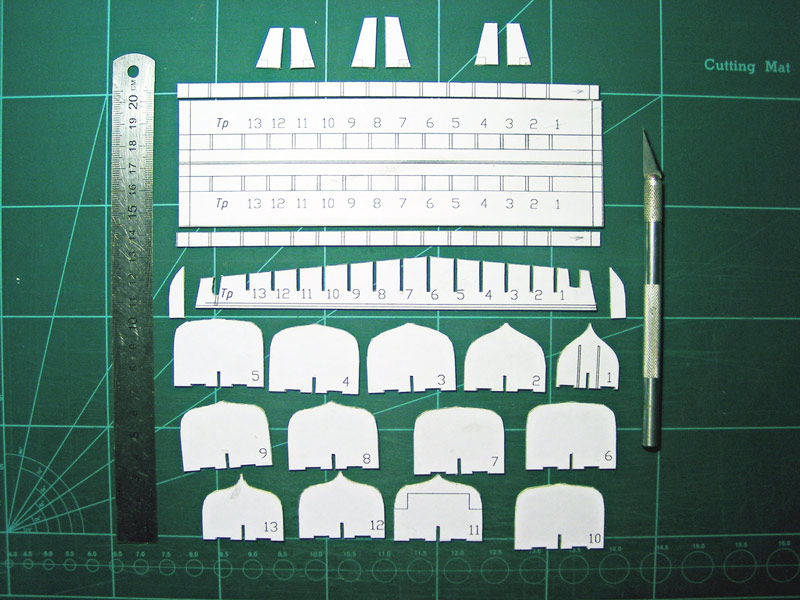
Slip:
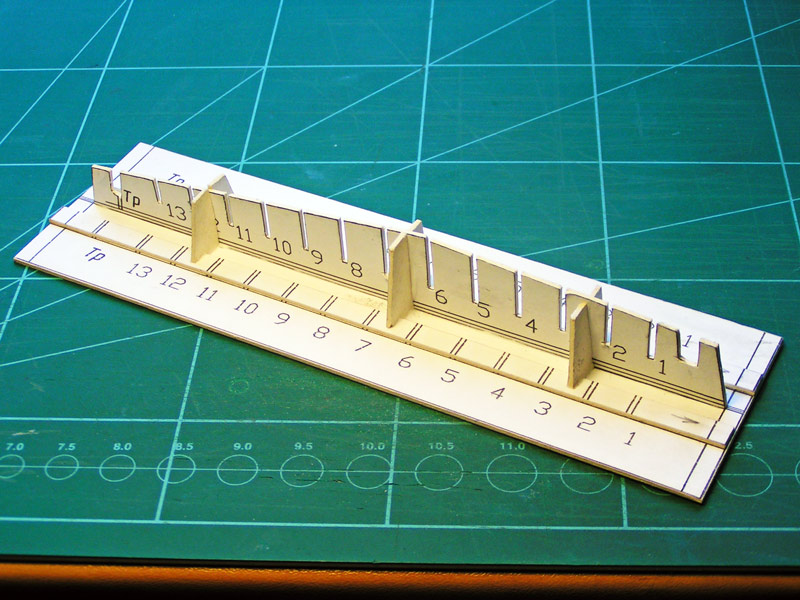
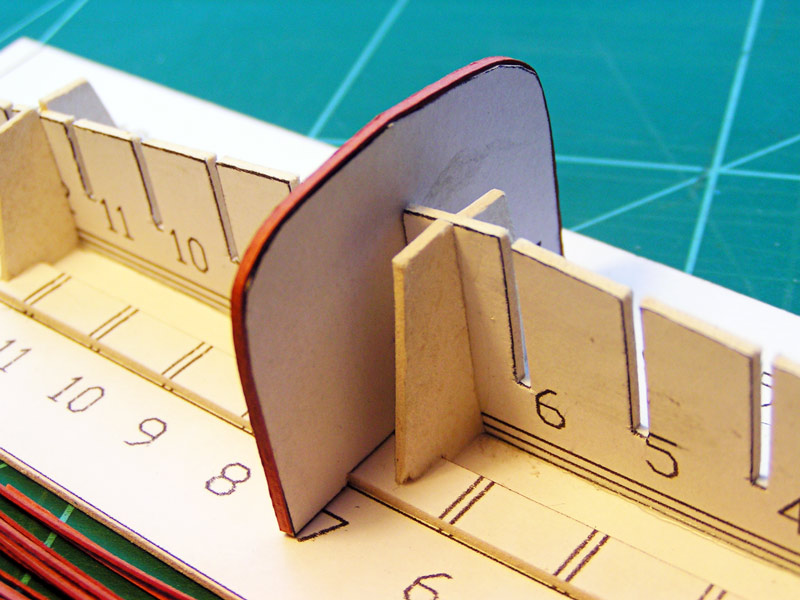
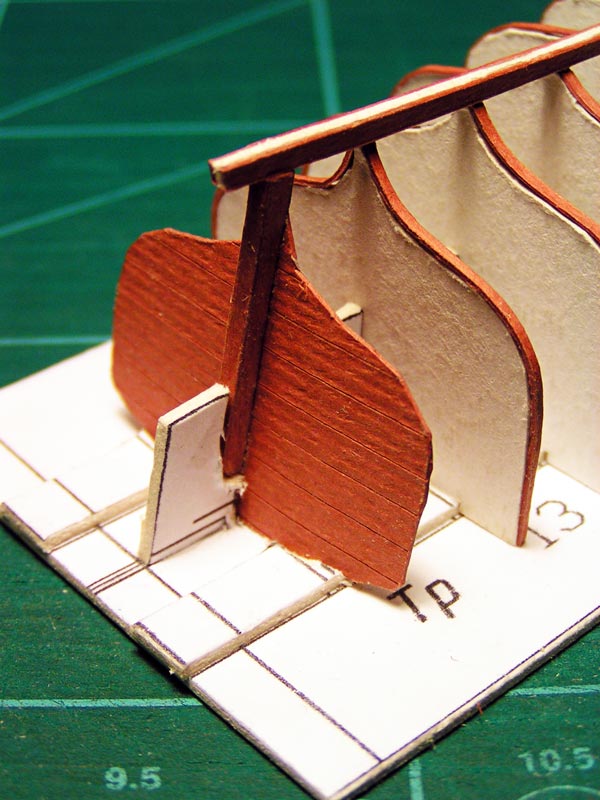
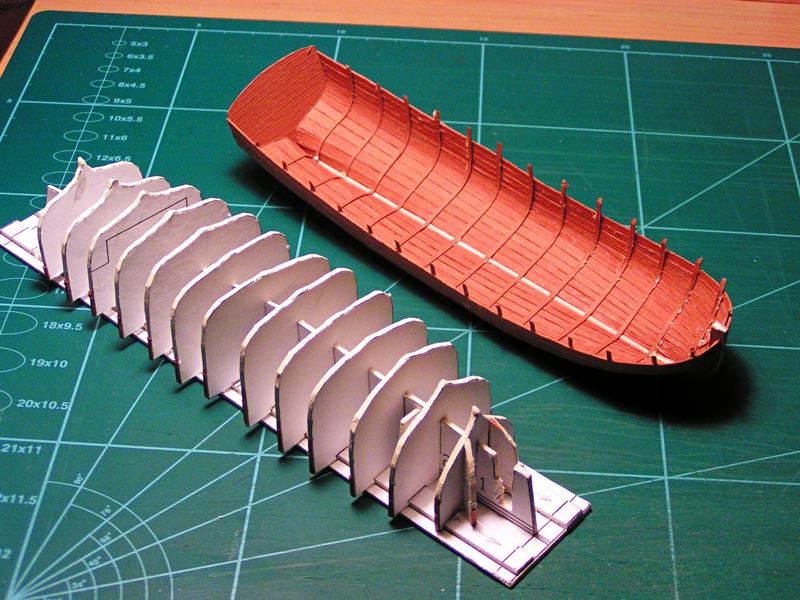
Frame and Template:
The frame strip must be pre-shaped into a form of template on which it will be installed on the slipway. Then place it on the template and glue the ends of the frame’s strip to the template above the longboat’s board line. In this case, the strip of the frame should be tightly pulled over the frame.
The hull of the longboat is keel up, so the side line will be the lowest when assembled. After installing the planks, the frames should be cut above the edge of the side. In our case in the most lower, slightly stepping back from the plane of the slipway.
Template with frame installed on slip:
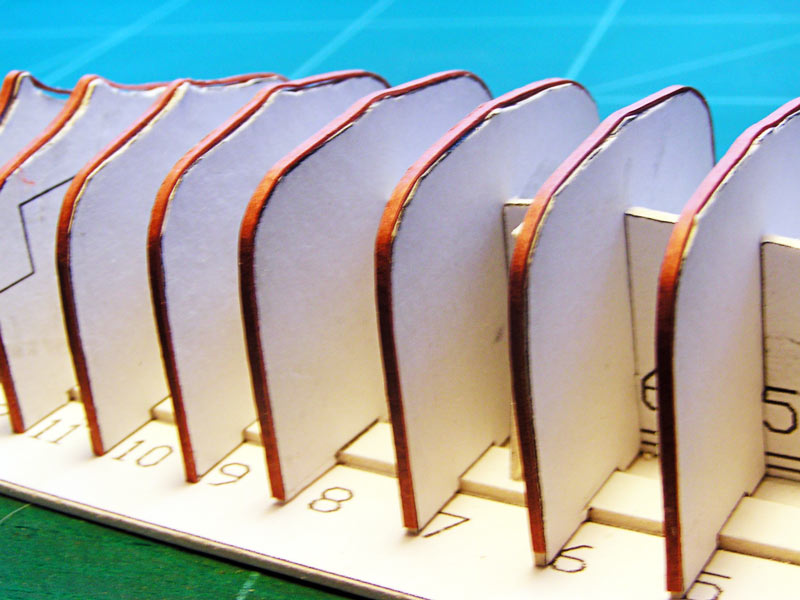
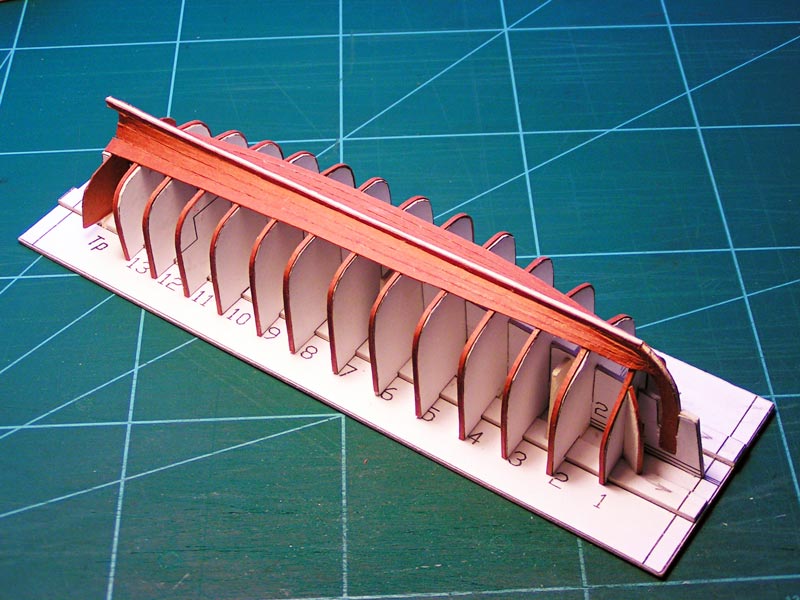
All templates with frames installed on the slip:
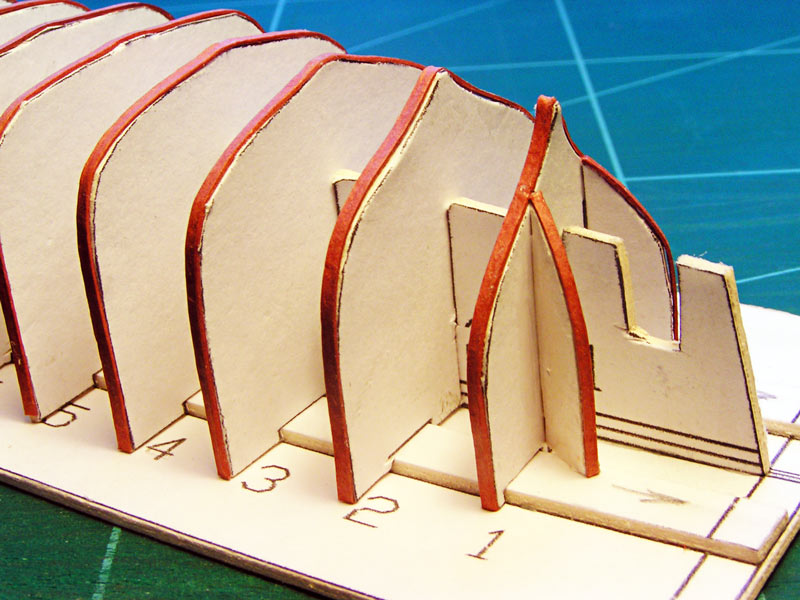
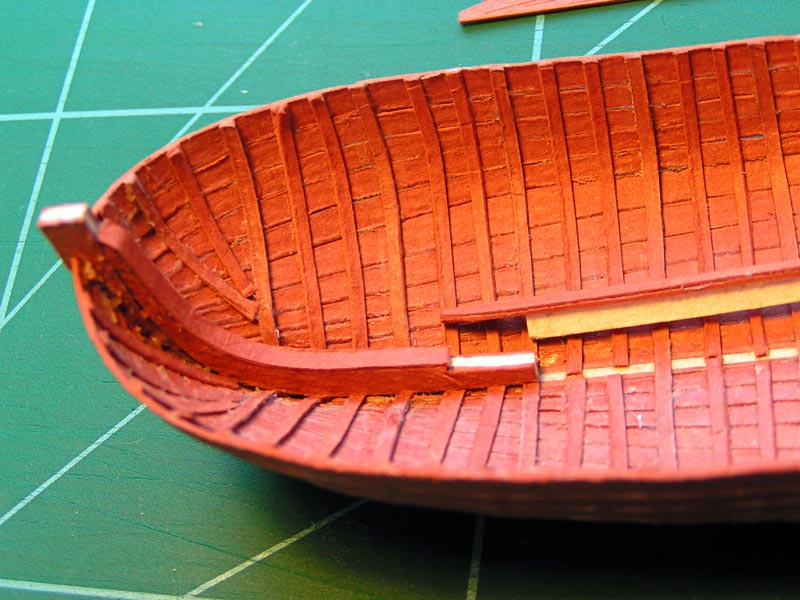
Now you need to put the transom in place. It must first be prepared. A stern post should be glued to the transom. Then the transom assembly must be installed on the slipway.
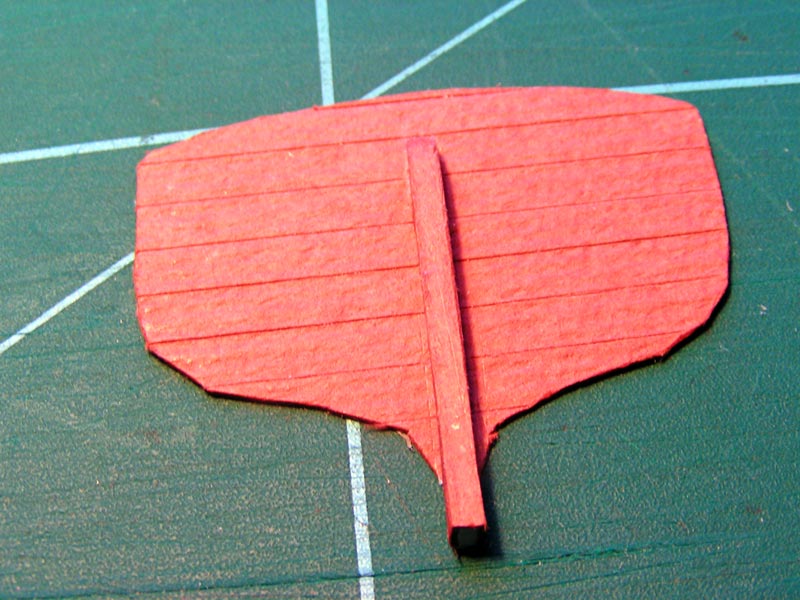
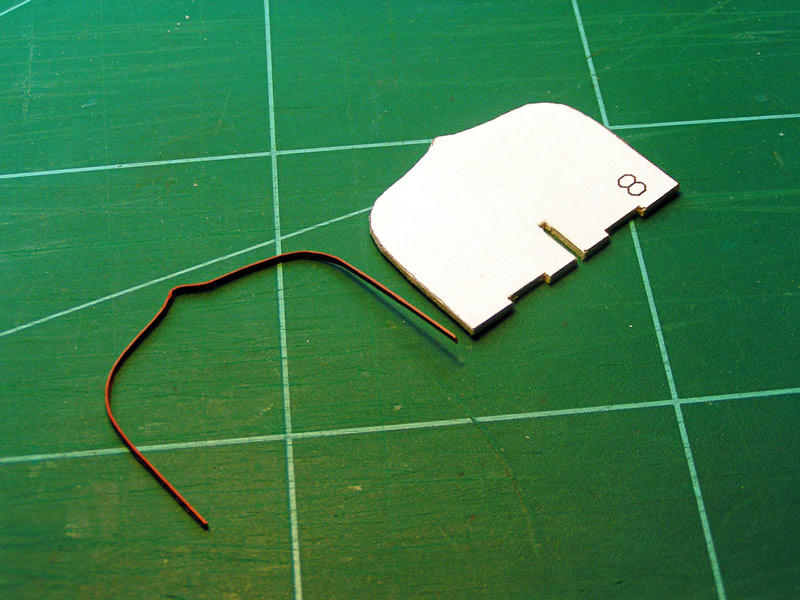
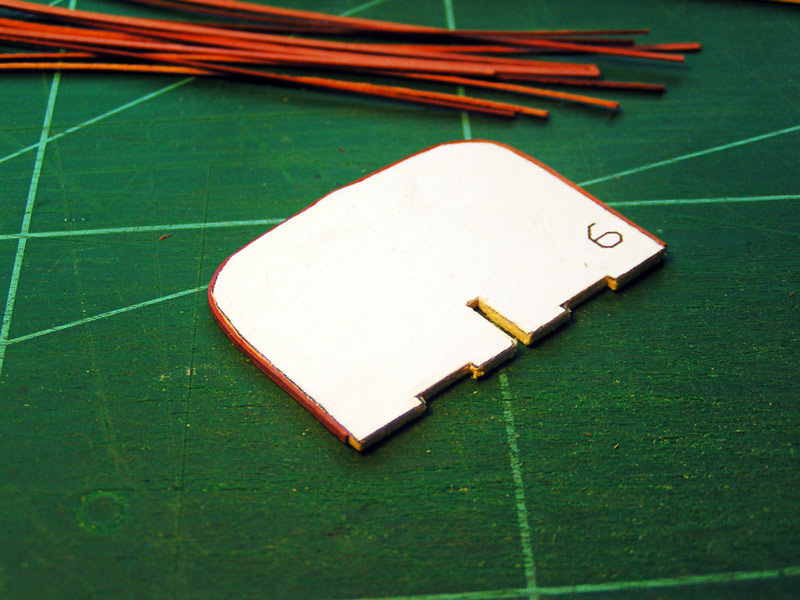
On the transom, you need to make an imitation of the joints of planks. For this, make cuts on the transom with the tip of a model knife. Do this imitation on all the details made from the planks.
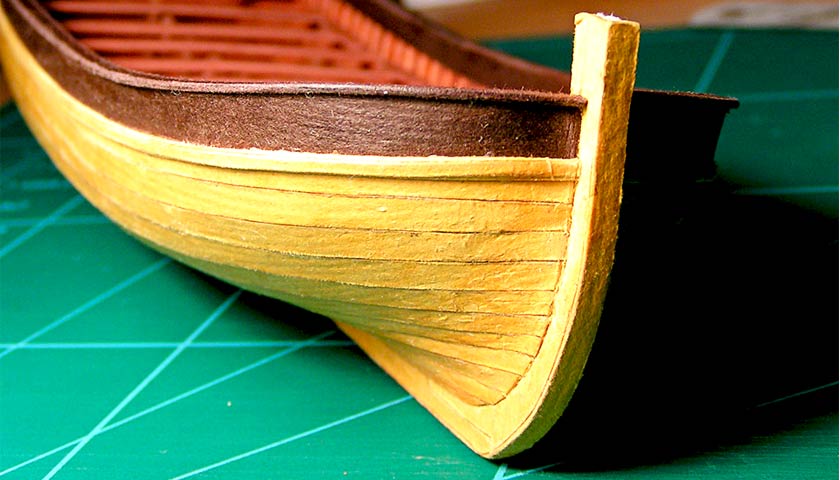
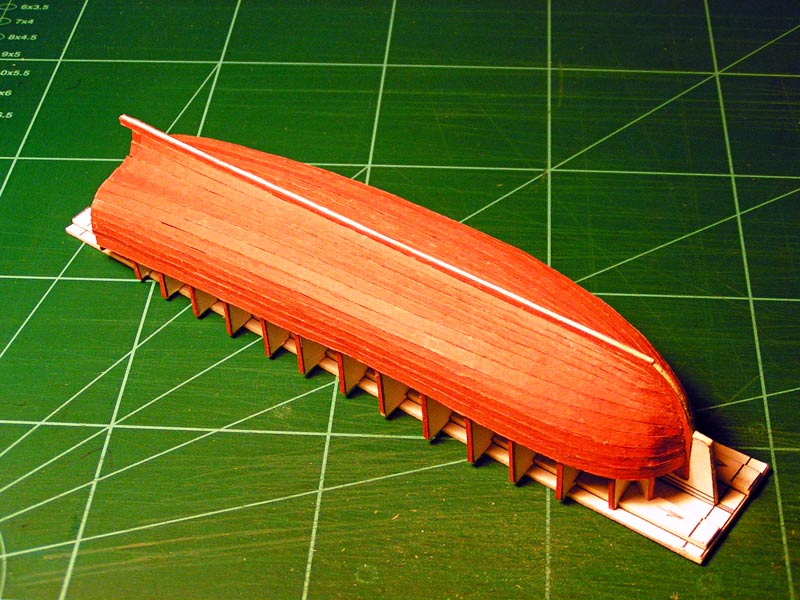
Now it is time to install hull skin. There are 15 planks for each side of the hull. I cut off each plank of the hull skin by hand, with a model knife and a student’s template. I was a student a long long time ago and made my shipbuilding drawings by pencil and ruler and templates.
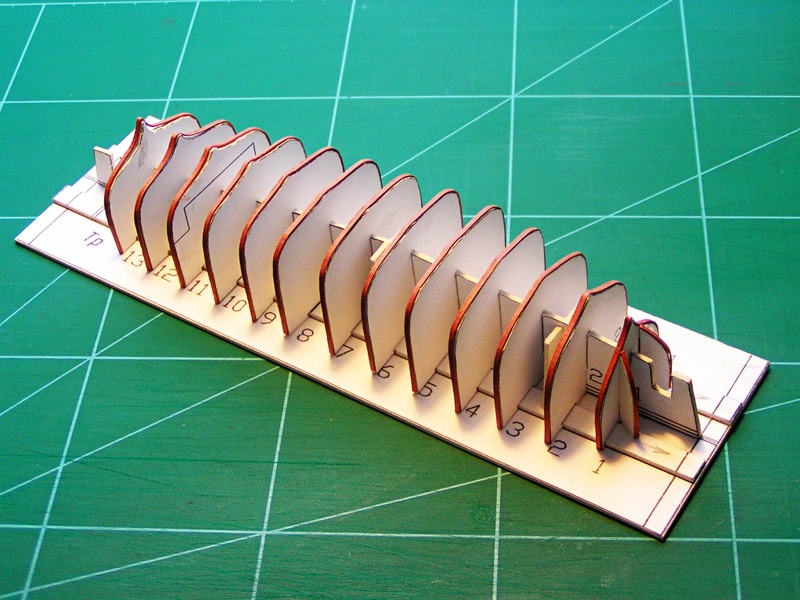
Hull skin is finally completed.
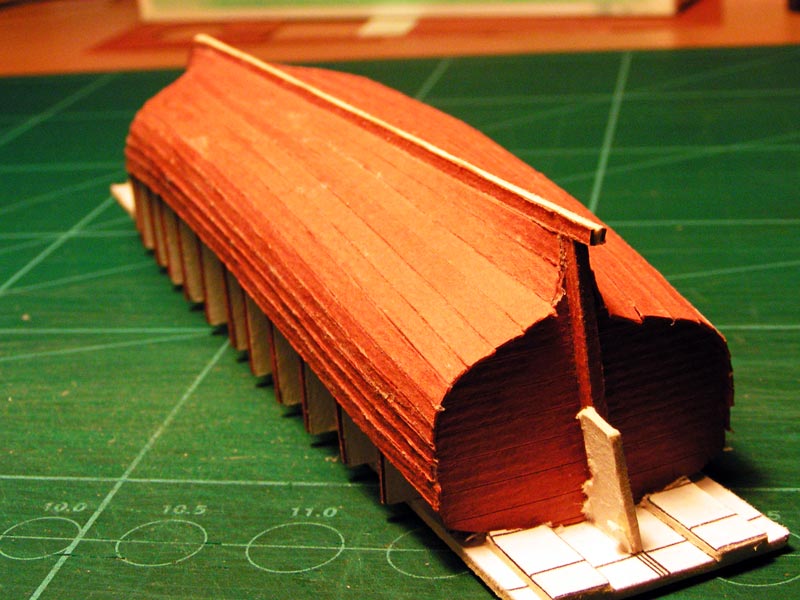
Let’s go on. Now it is time to remove a boat hull from a slip.
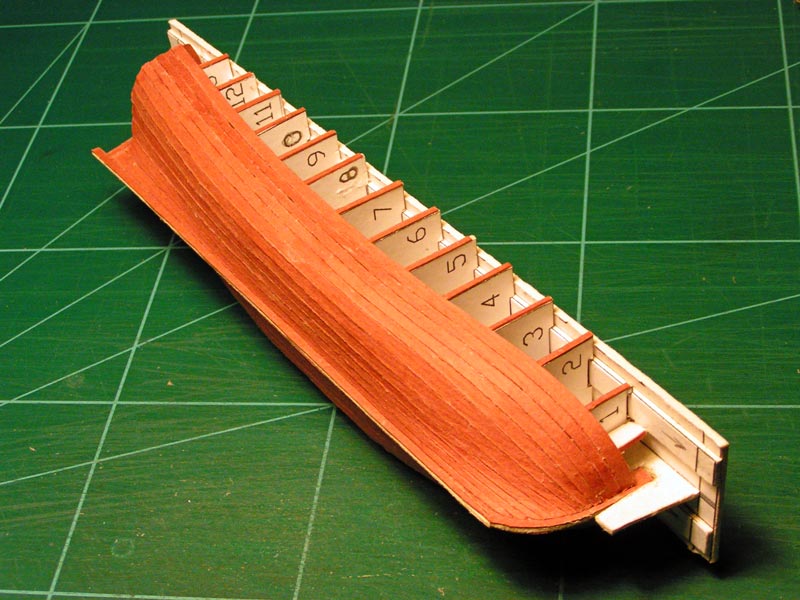
Pay attention to places where the frame’s strips have been cutted.
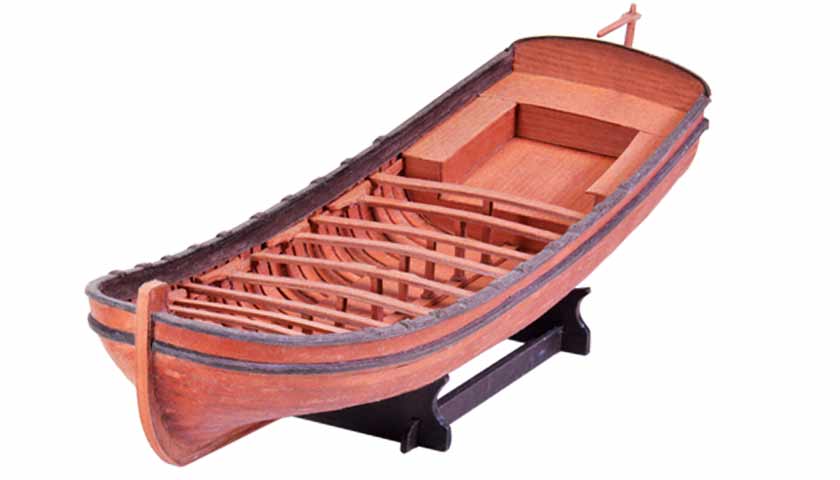
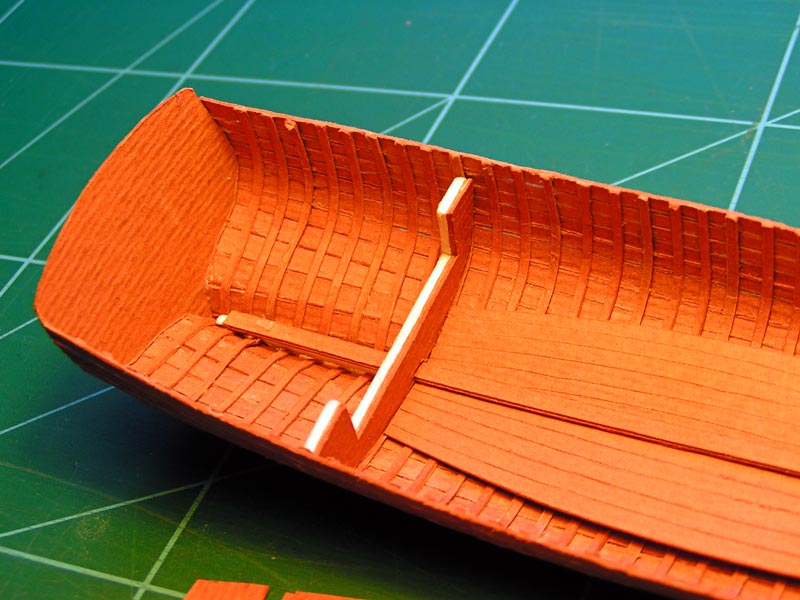
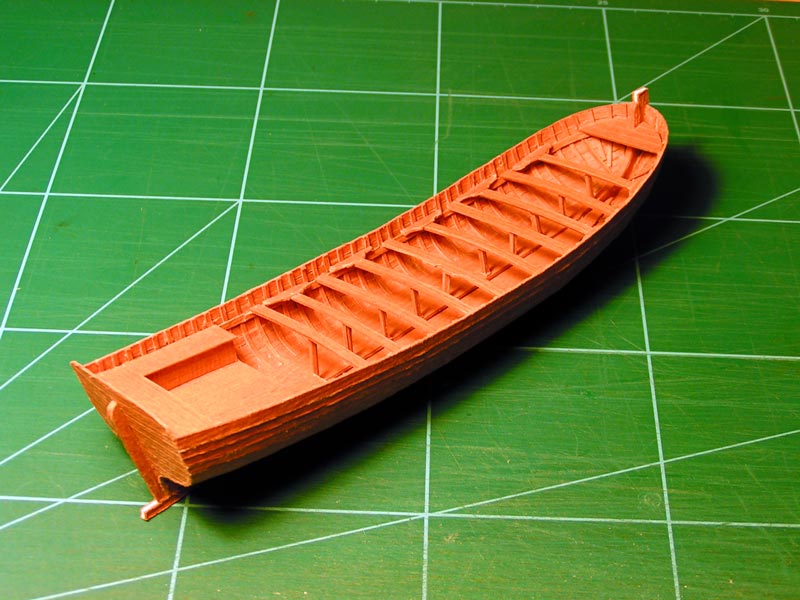
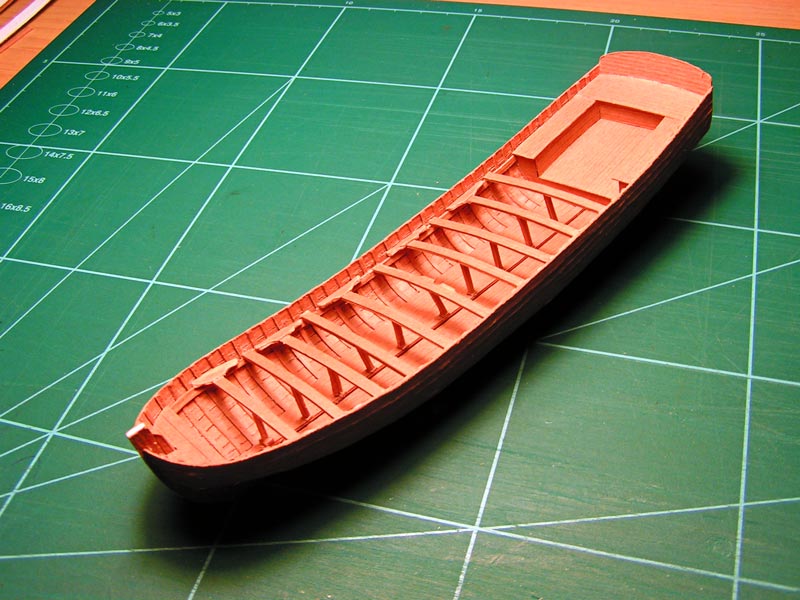
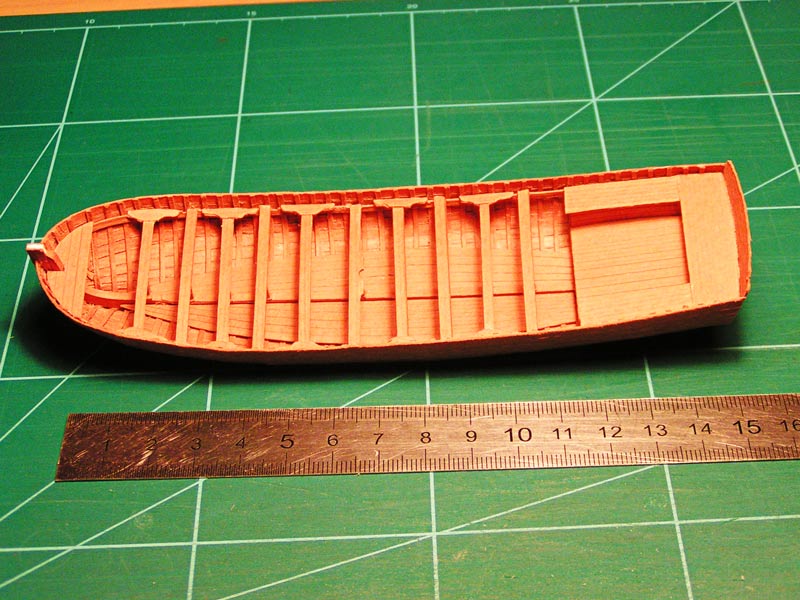
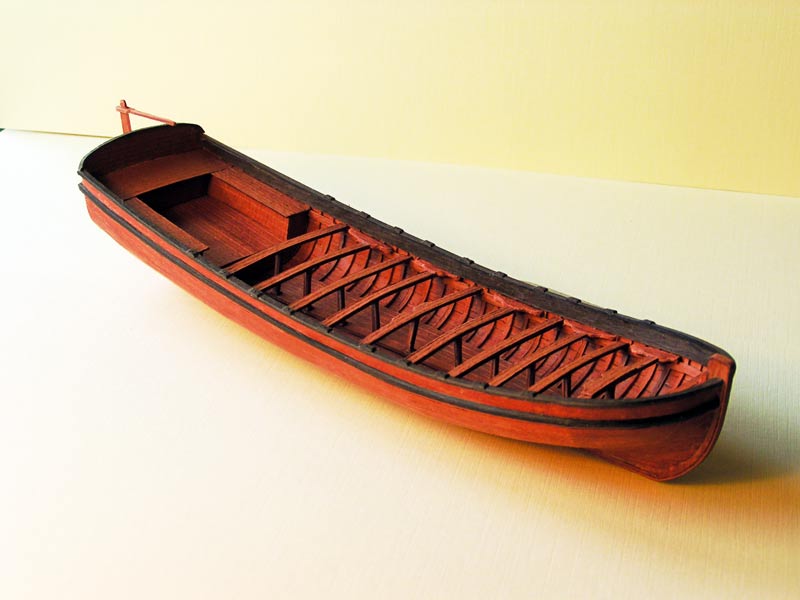
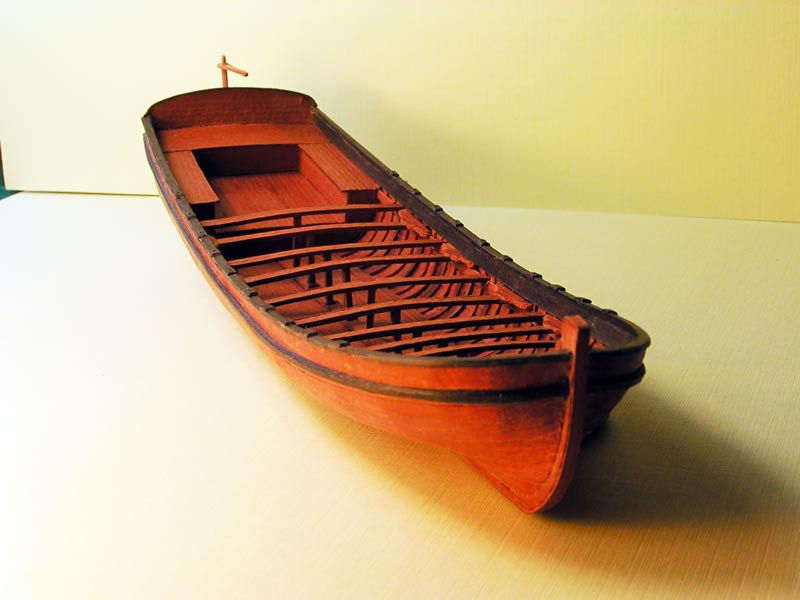
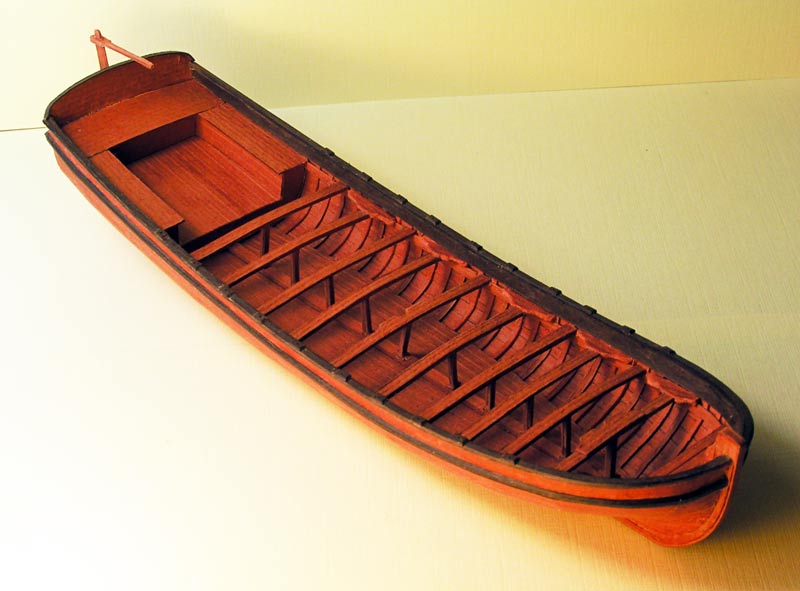
Photos of the inside fitting boat hull here. You can see additional frames that are installed between the previous frames, the apron, keelson, rising, bottom boards, left and right board and stern cockpit which had been installed on its places.
See photos here:
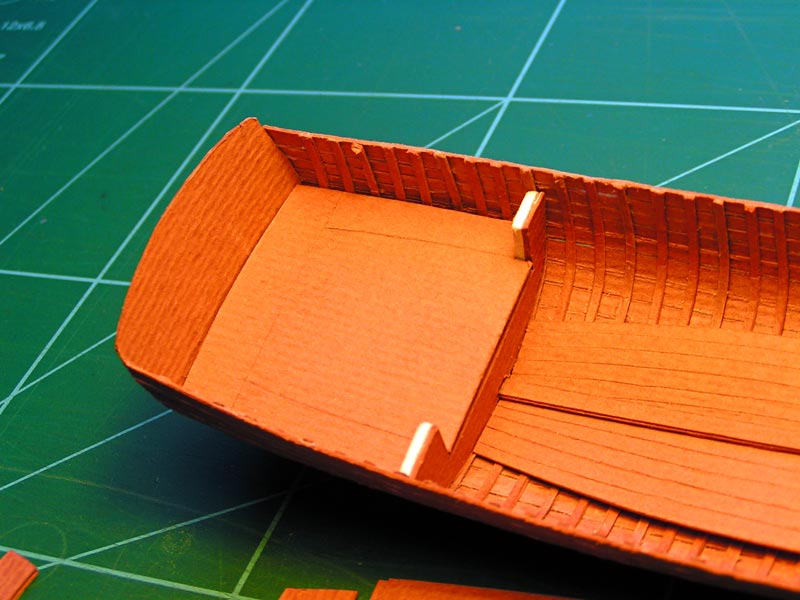
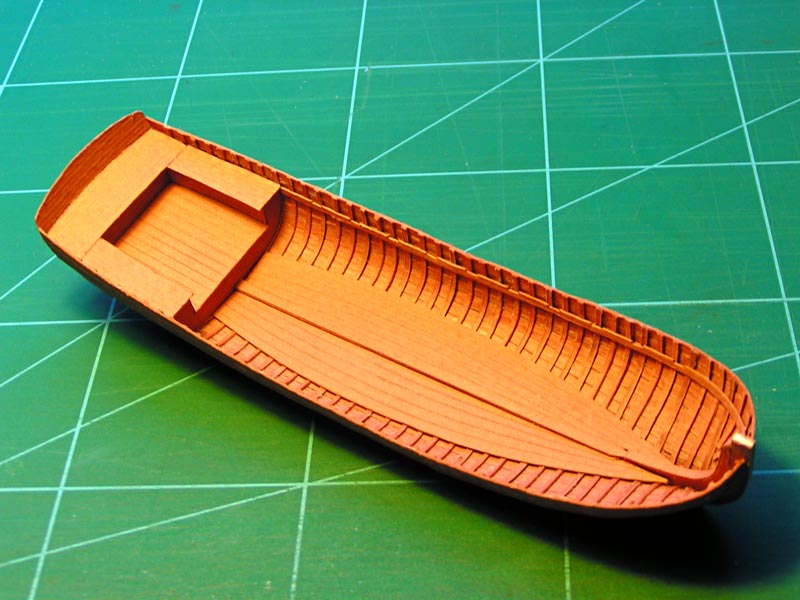
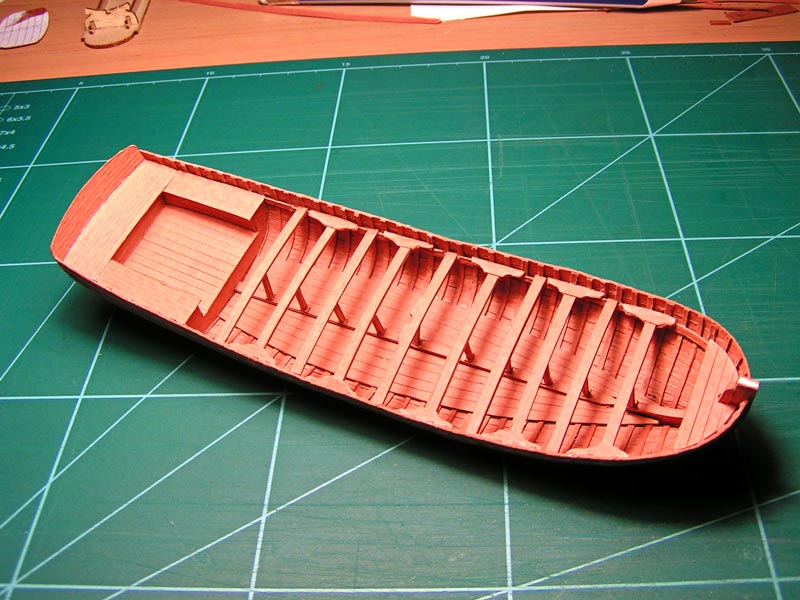
Other photos about the inside fitting boat hull. You can see installing thwarts in the middle part of the hull. This rather hard process takes a lot of patience….
See photos here:
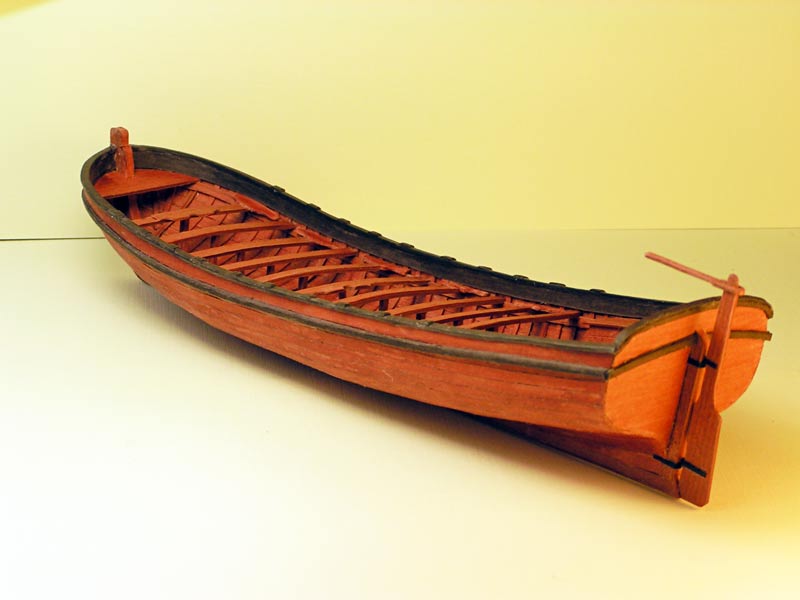
Now is the last stroke or final photo session for your attention. This is a completed model of a longboat. The job is done!


As a result I published a PSG-Modeler magazine. While in Russian. I am going to translate the build instructions into English so that everyone can get familiar with this release. This is a cover of this release.