At the very beginning, I must say: I don’t know how Blender actually works. I have not taken lessons to work with Blender from a renowned 3D modeling guru. I do not know on what mathematical principles the Blender algorithm is built.
I understand the physical principles of the rendering engine, but not completely. In short, I began to study Blender in order to learn how to build 3D models in it. Then I want to paint them and make unfolded details from which you can assemble a paper model.
Here I want to share with you my knowledge of working at Blender. Why am I doing this?
Firstly, Blender is a very complex program and requires systematic study. But, there is not enough time for this.
Secondly, I know that there are other people who, like me, are trying to learn how to work in Blender. I would like to establish a dialogue with them and exchange knowledge.
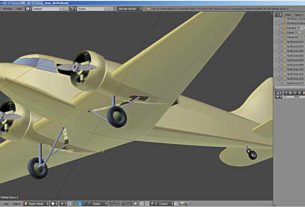
Now I’m going to tell you what I was able to find out about how to work in Blender. I have already started talking about modeling 3D objects here on the site. Now I want to talk about how to color a 3D model. I have this plane.
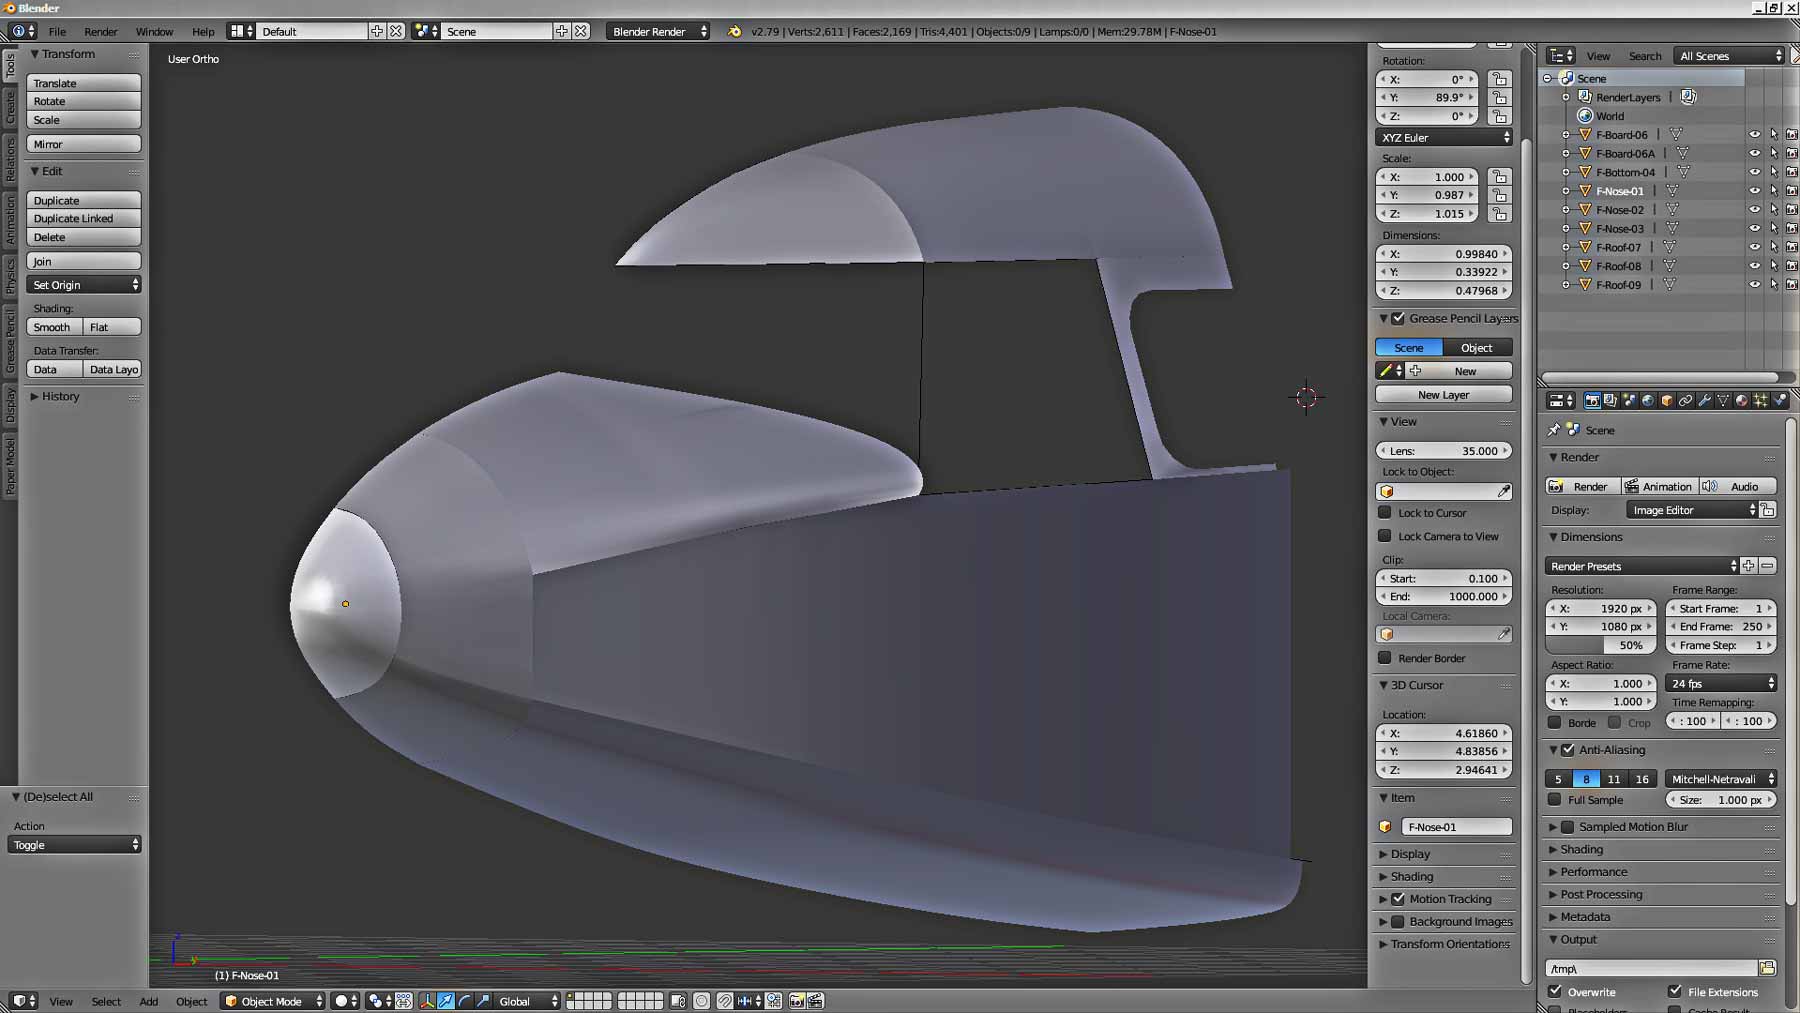
Let’s take the nose of the plane, and see how software works.
The nose of the aircraft consists of 9 parts. I took an arbitrary number of them. Each part is colored gray by default in Blender. Which color should you choose for your plane? This is a difficult question for me, because for a car I cannot understand which color I like. Although when I bought a car last time, I had to consider the color as the last thing.
So, we need to take the first step, let’s take white for the roof. How do I assign white to the roof details of an airplane? In fact, it is very simple.
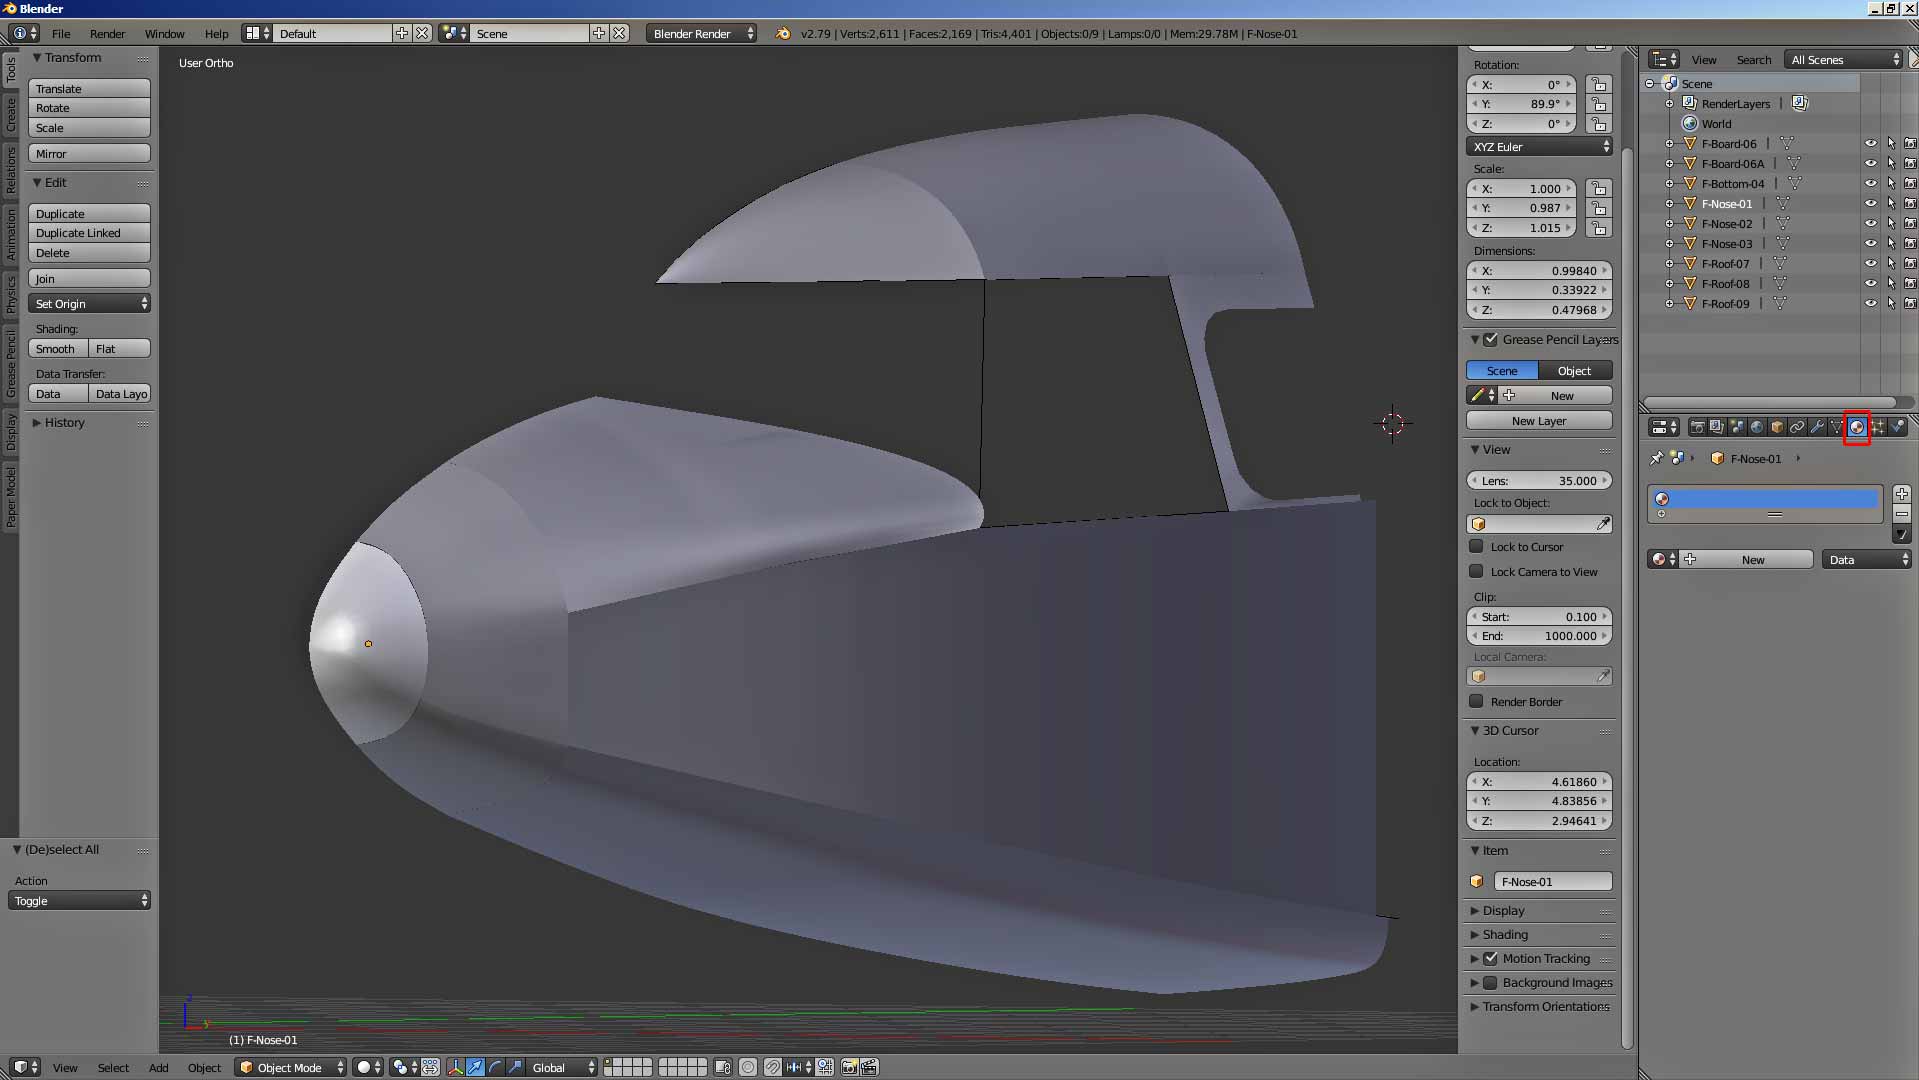
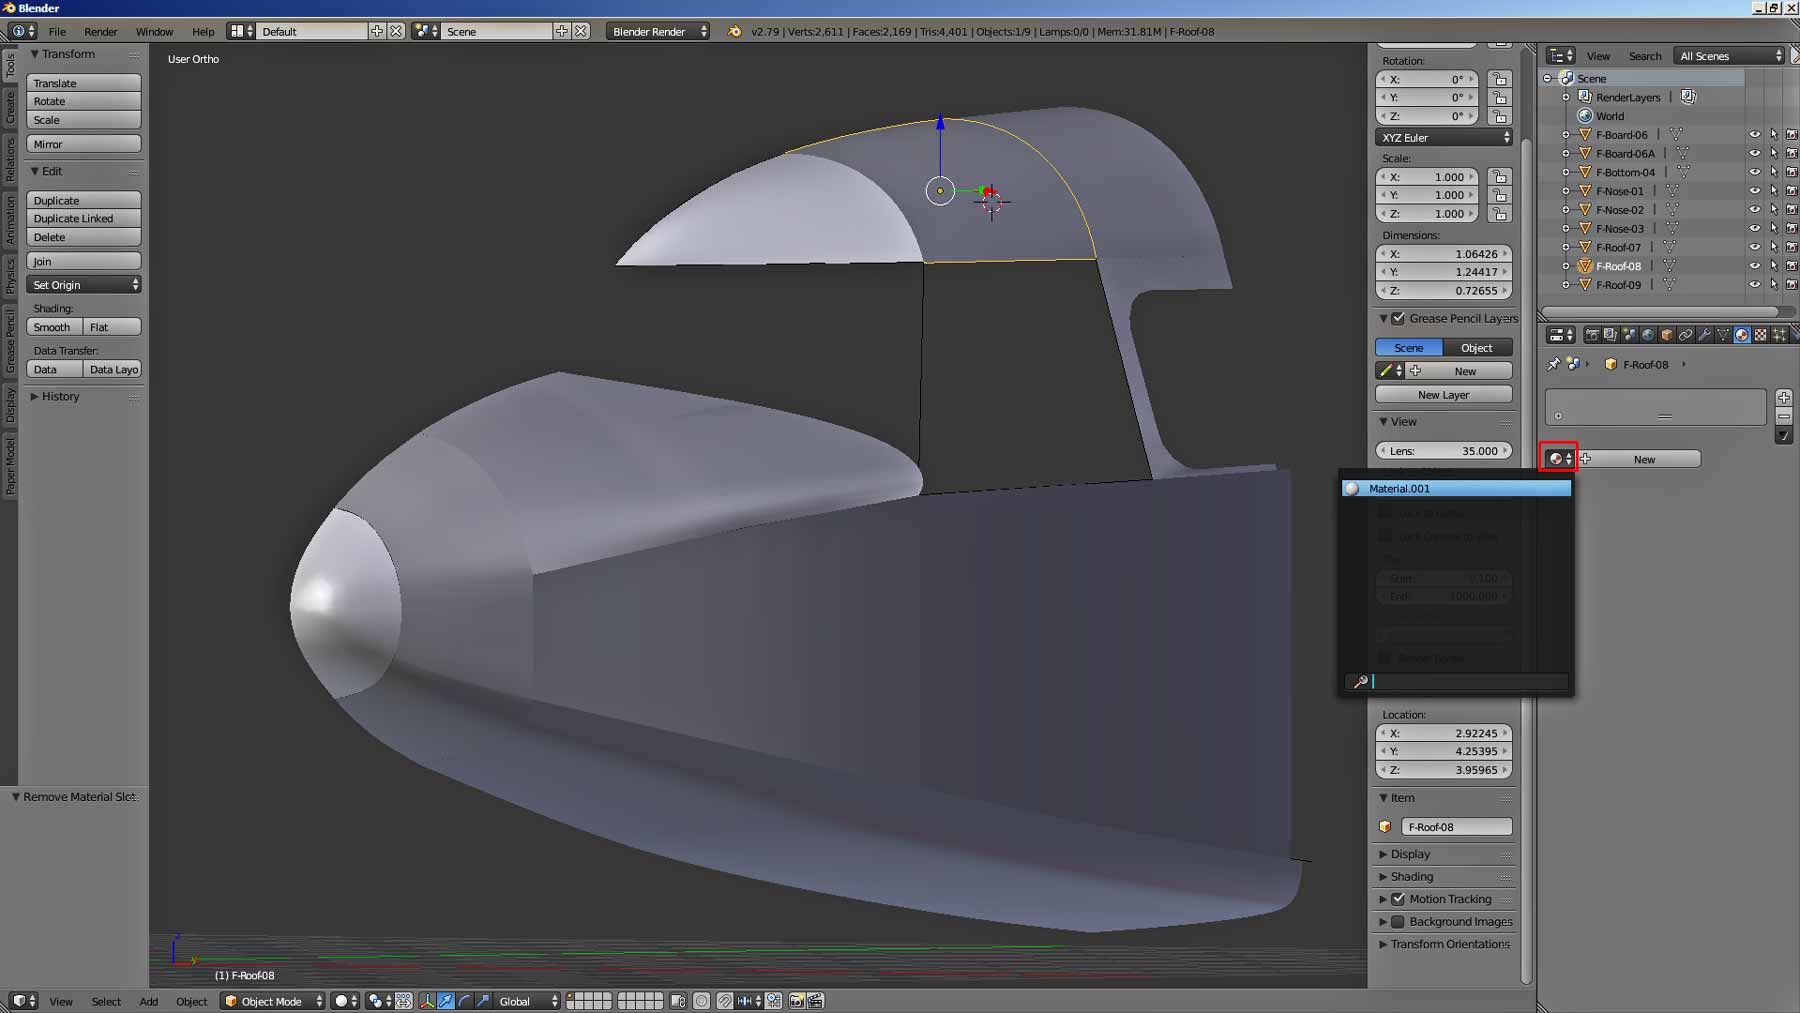
1. You need to go to the «Material» panel in the «Properties» section. This is the lower right panel.
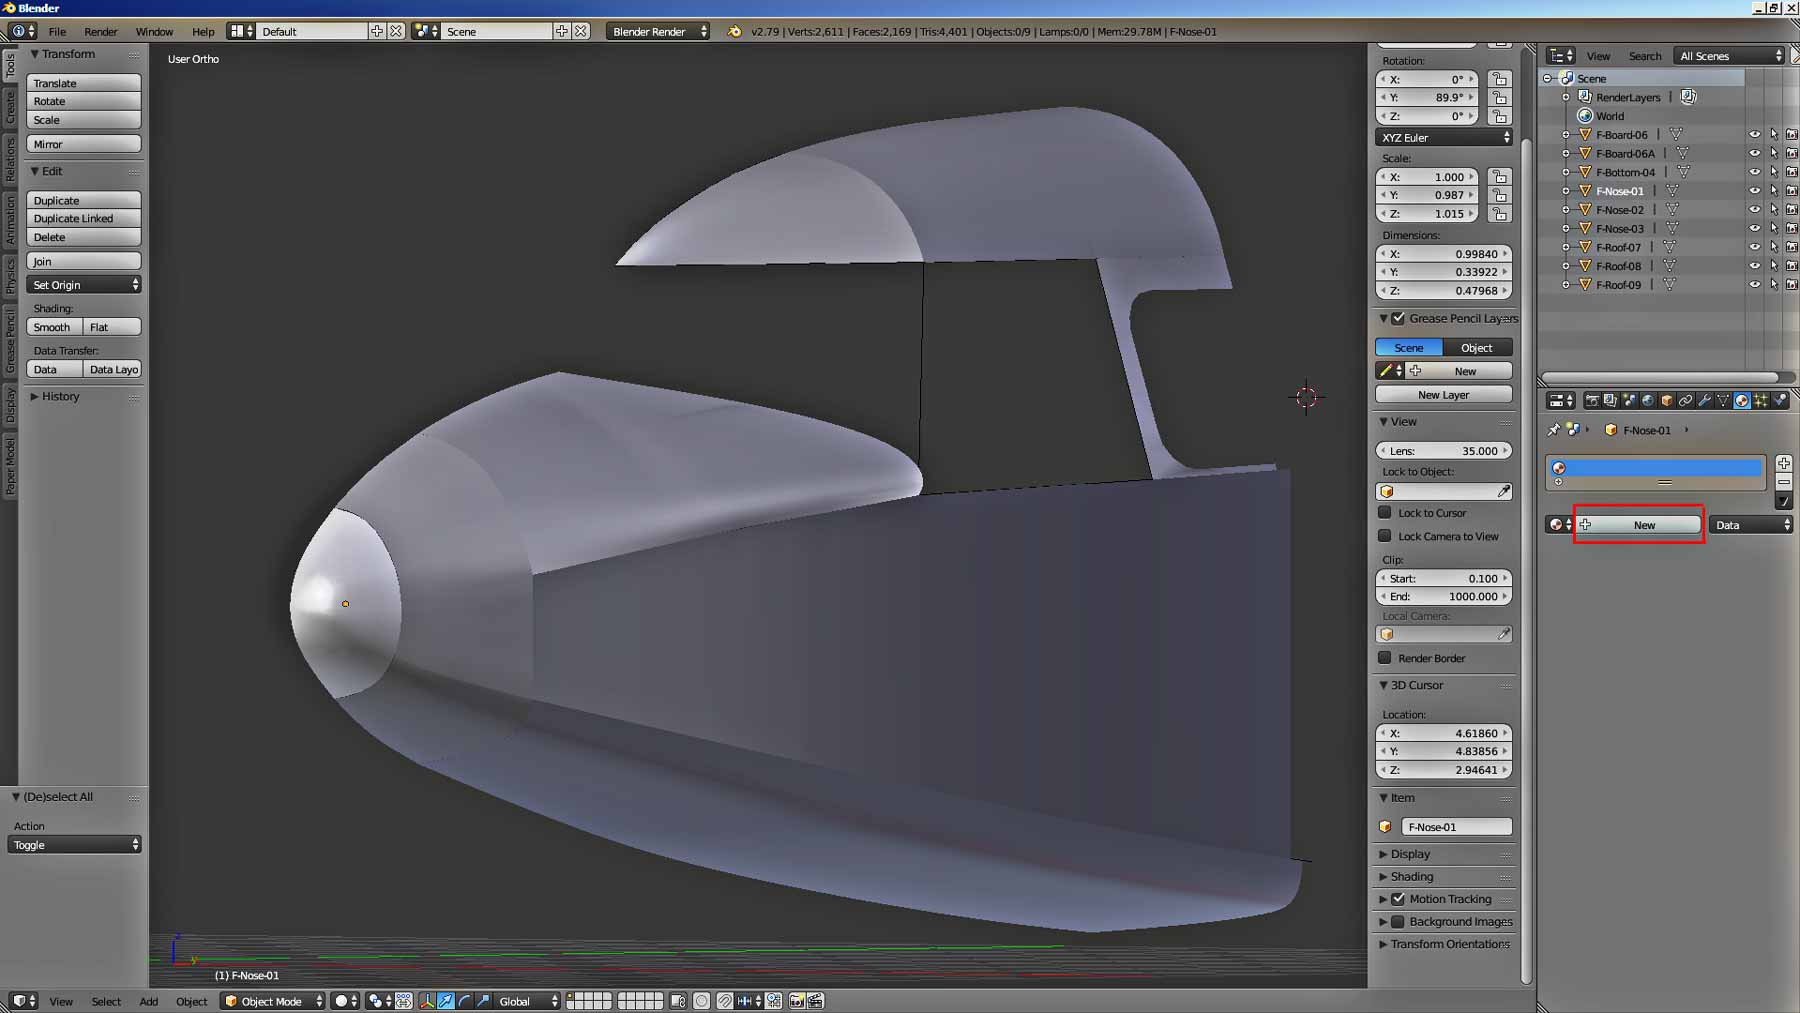
2. Select the New button and click on it.
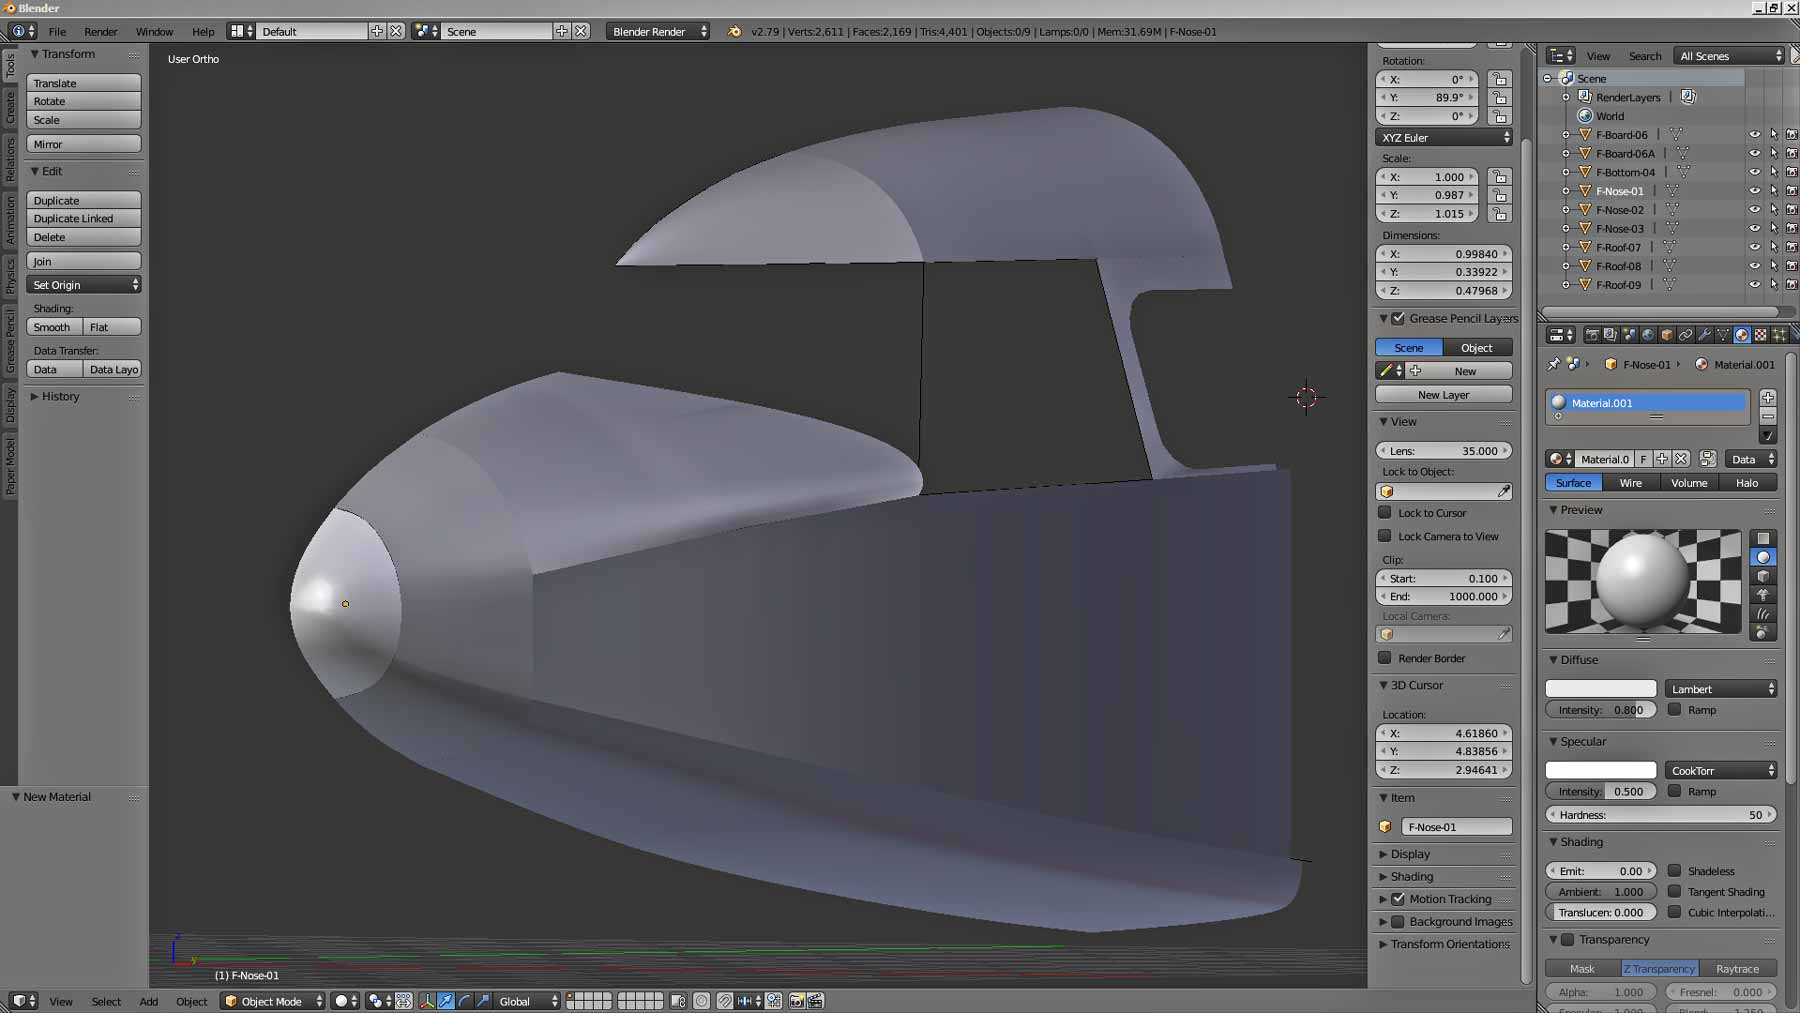
3. The material properties panel will open. There you can select the color of the material, the reflectivity of the material, the color of the material flare, the properties of the shadow that the object with the selected material accepts or casts, and many other parameters.
To understand how it works, it is best to start with the simplest, with the color of the material, leaving all other settings as they are, by default.
In the Preview window, you can select a sample of the object on which the selected material will be visible. These are plane, sphere, cube and other shapes.
The Diffuse panel is responsible for the color of the material. There is a white rectangle there, by clicking on which you can select the color of your material from the opened color picker.
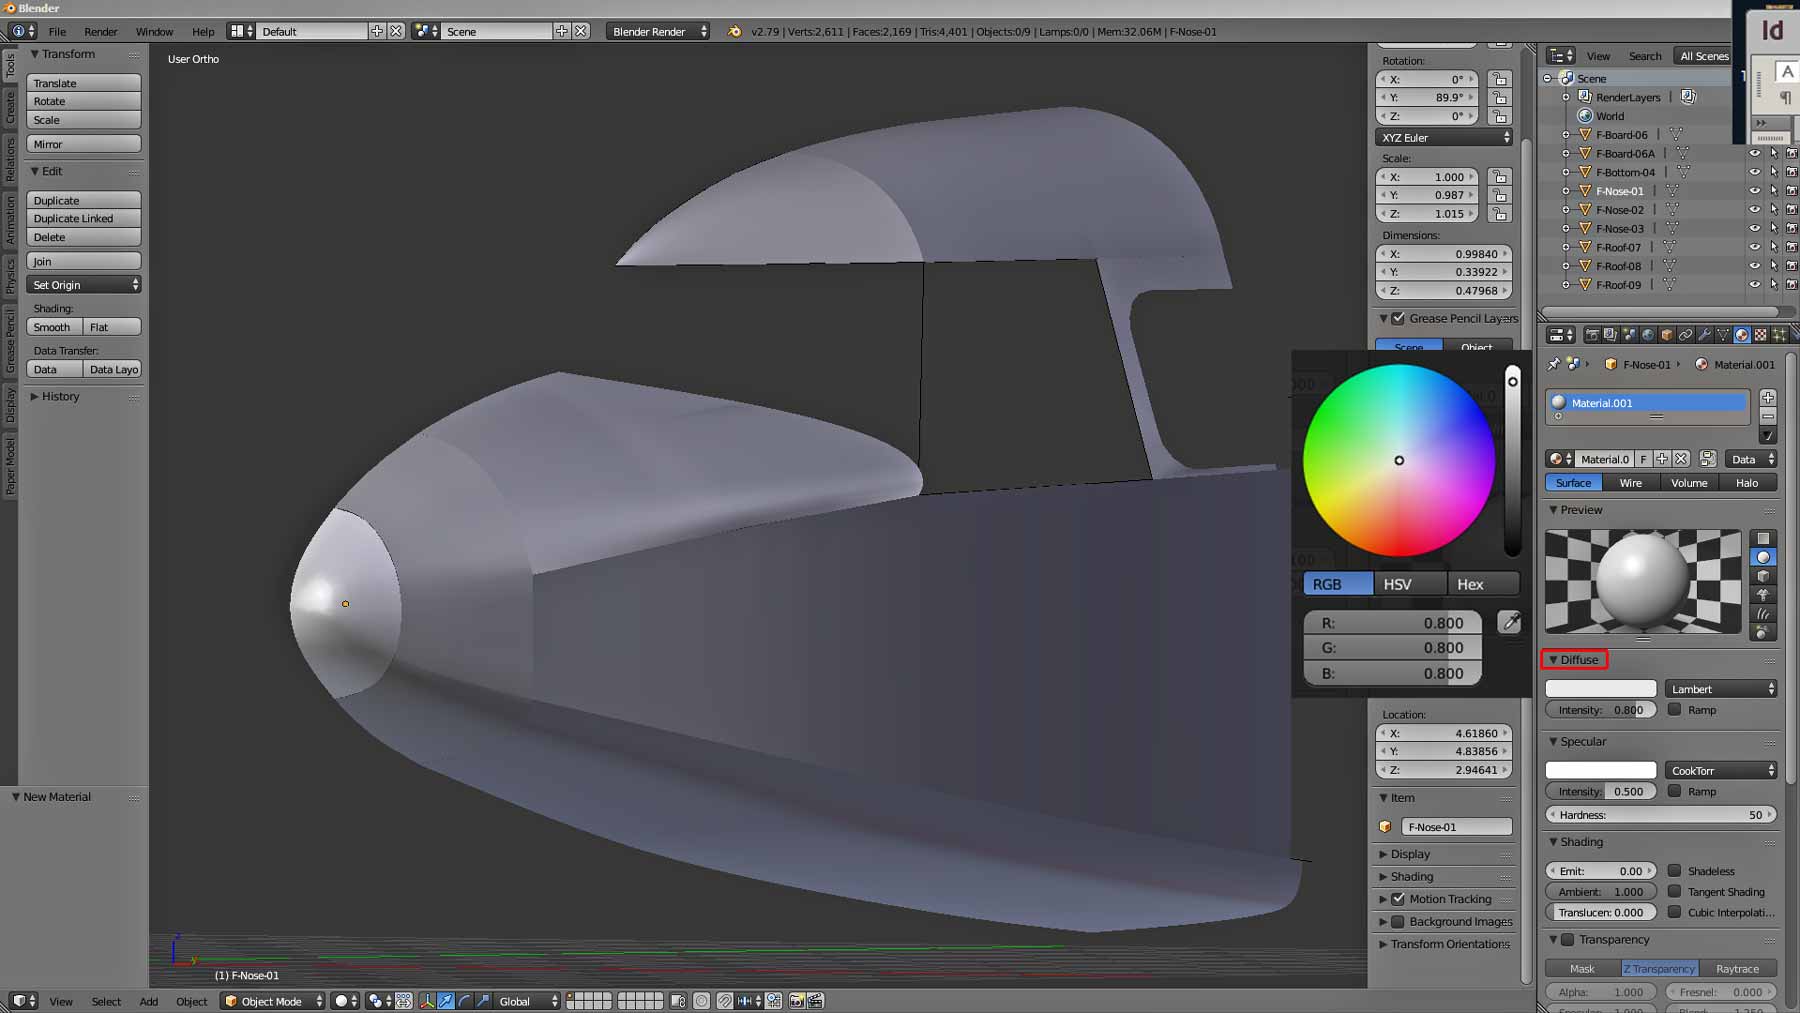
Let’s choose our color. We wanted to choose white for the roof of the plane. So we will leave the default color of the palette. Do not forget to select the part you want to paint before doing this. The selection is made by clicking on the part with the right mouse button.
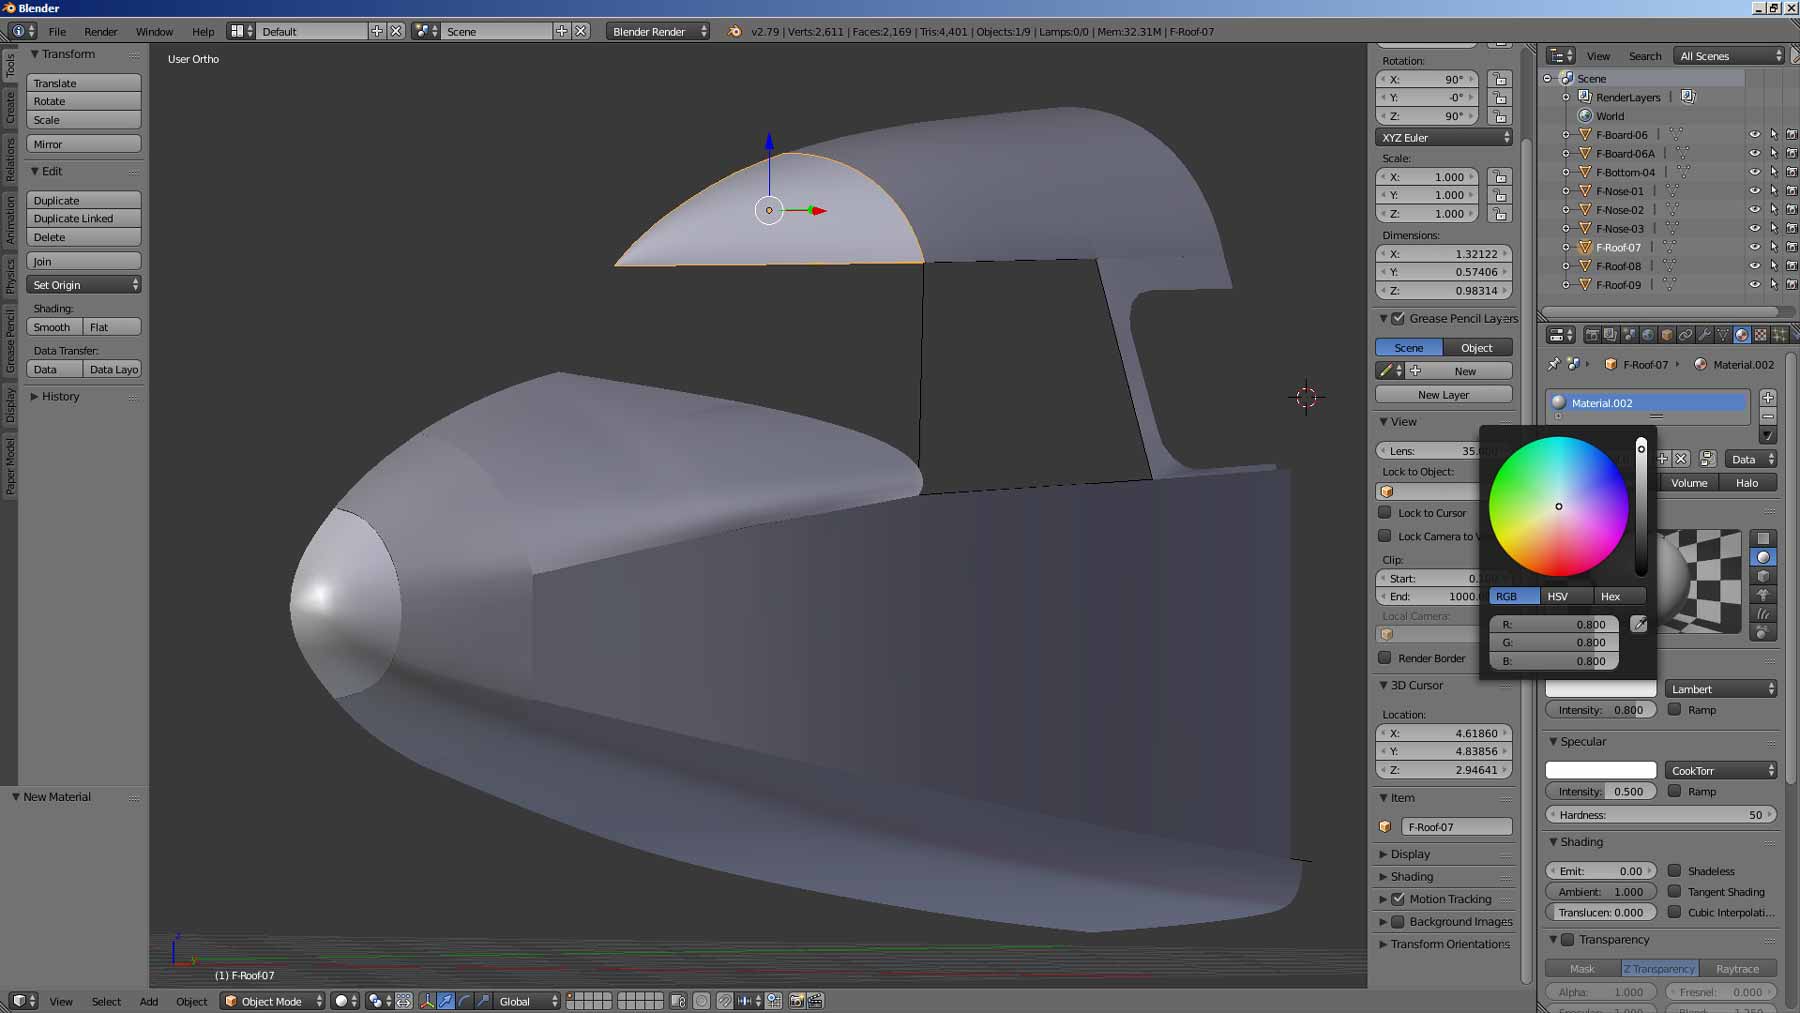
As you can see on the monitor, the front roof detail of the aircraft has turned white. Unfortunately, I did not find in Blender the possibility of multiple assignments of material to several objects at once. You can assign a material to only one object at a time. In our example, the roof consists of three parts. Let’s assign them white color. How to do it?
If we create a new material again with the New button, as we did with the first roof part, we get another one material, also white. There is no sense in duplicating the same material. To apply an existing material to a part, we must open the list of existing materials by clicking on the button with two vertical arrows to the left of the button for creating a new material New. By clicking on this button, you will open a list of existing materials.
In this list, we have had only one material so far – white. By clicking on this white material, having previously selected the second part of the roof of our aircraft, we will paint it the same white as the first part of the roof. You also need to paint the third part of the roof of the aircraft. We now have all three parts of the plane’s roof white.
However, you may notice that the shade of white is different for all three parts. The nose piece is «whitest». The other two are noticeably darker and more gray than white. Why did it happen?
The fact is that Blender works with light in a very clever way. Including with the light reflected from the object. Depending on the angle at which a ray of light reflected from an object enters our eye, the shade of the object’s color changes. It is easy to see this on a sunny day by looking closely, for example, at a car parked in the sun.
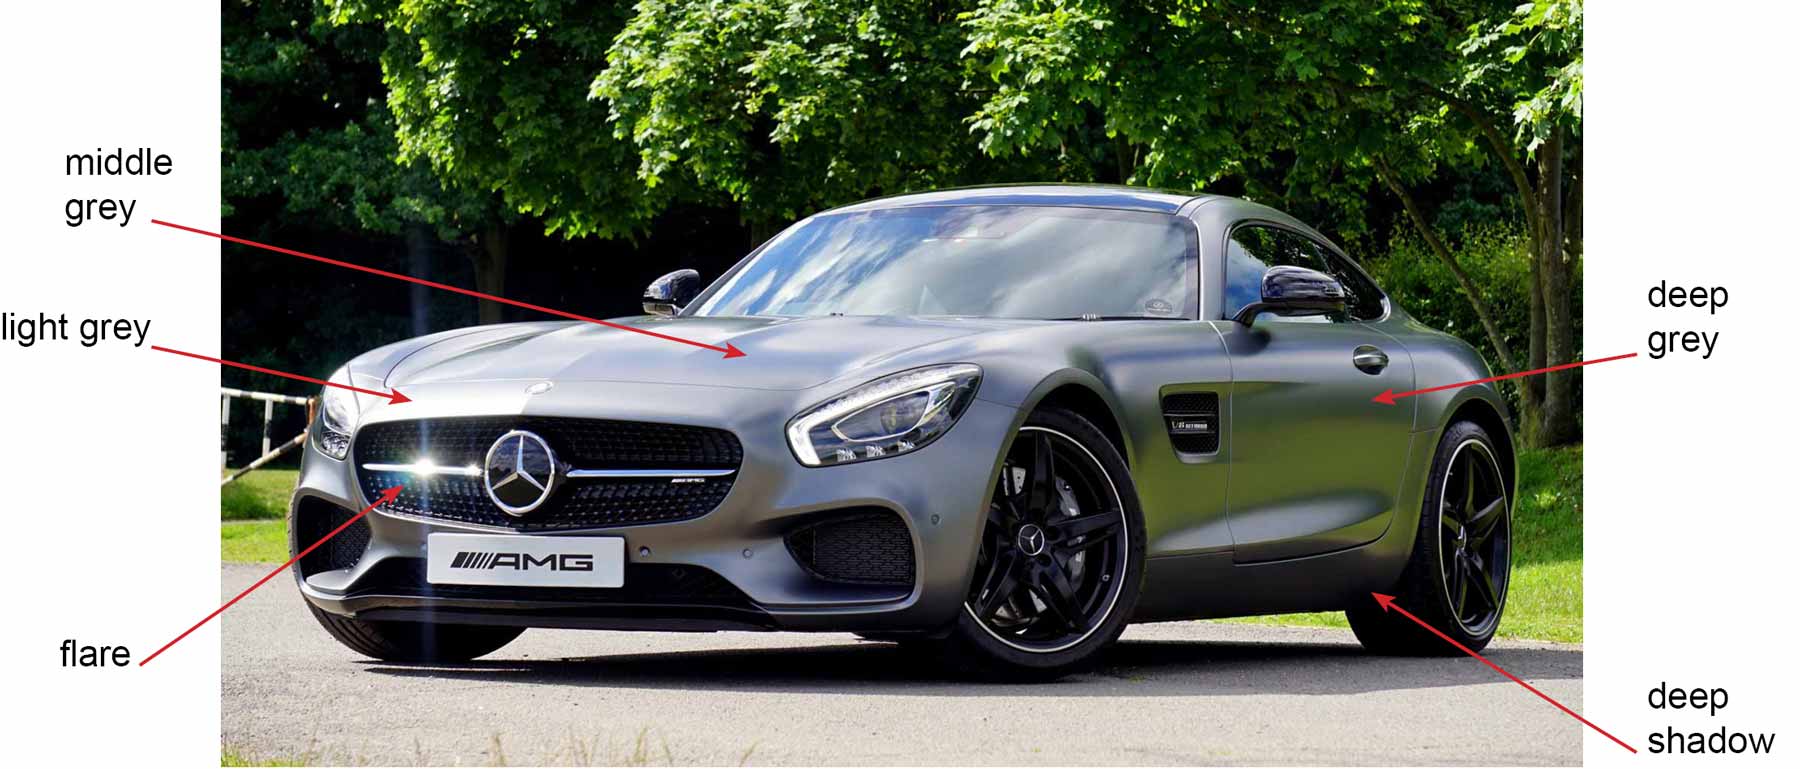
We see a glare, a deep, almost black shadow and endless shades of gray: from light gray through gray to dark gray. They all depend on the angle at which the light is reflected from the surface of the car.
How can this endless variety be reflected in Blender?
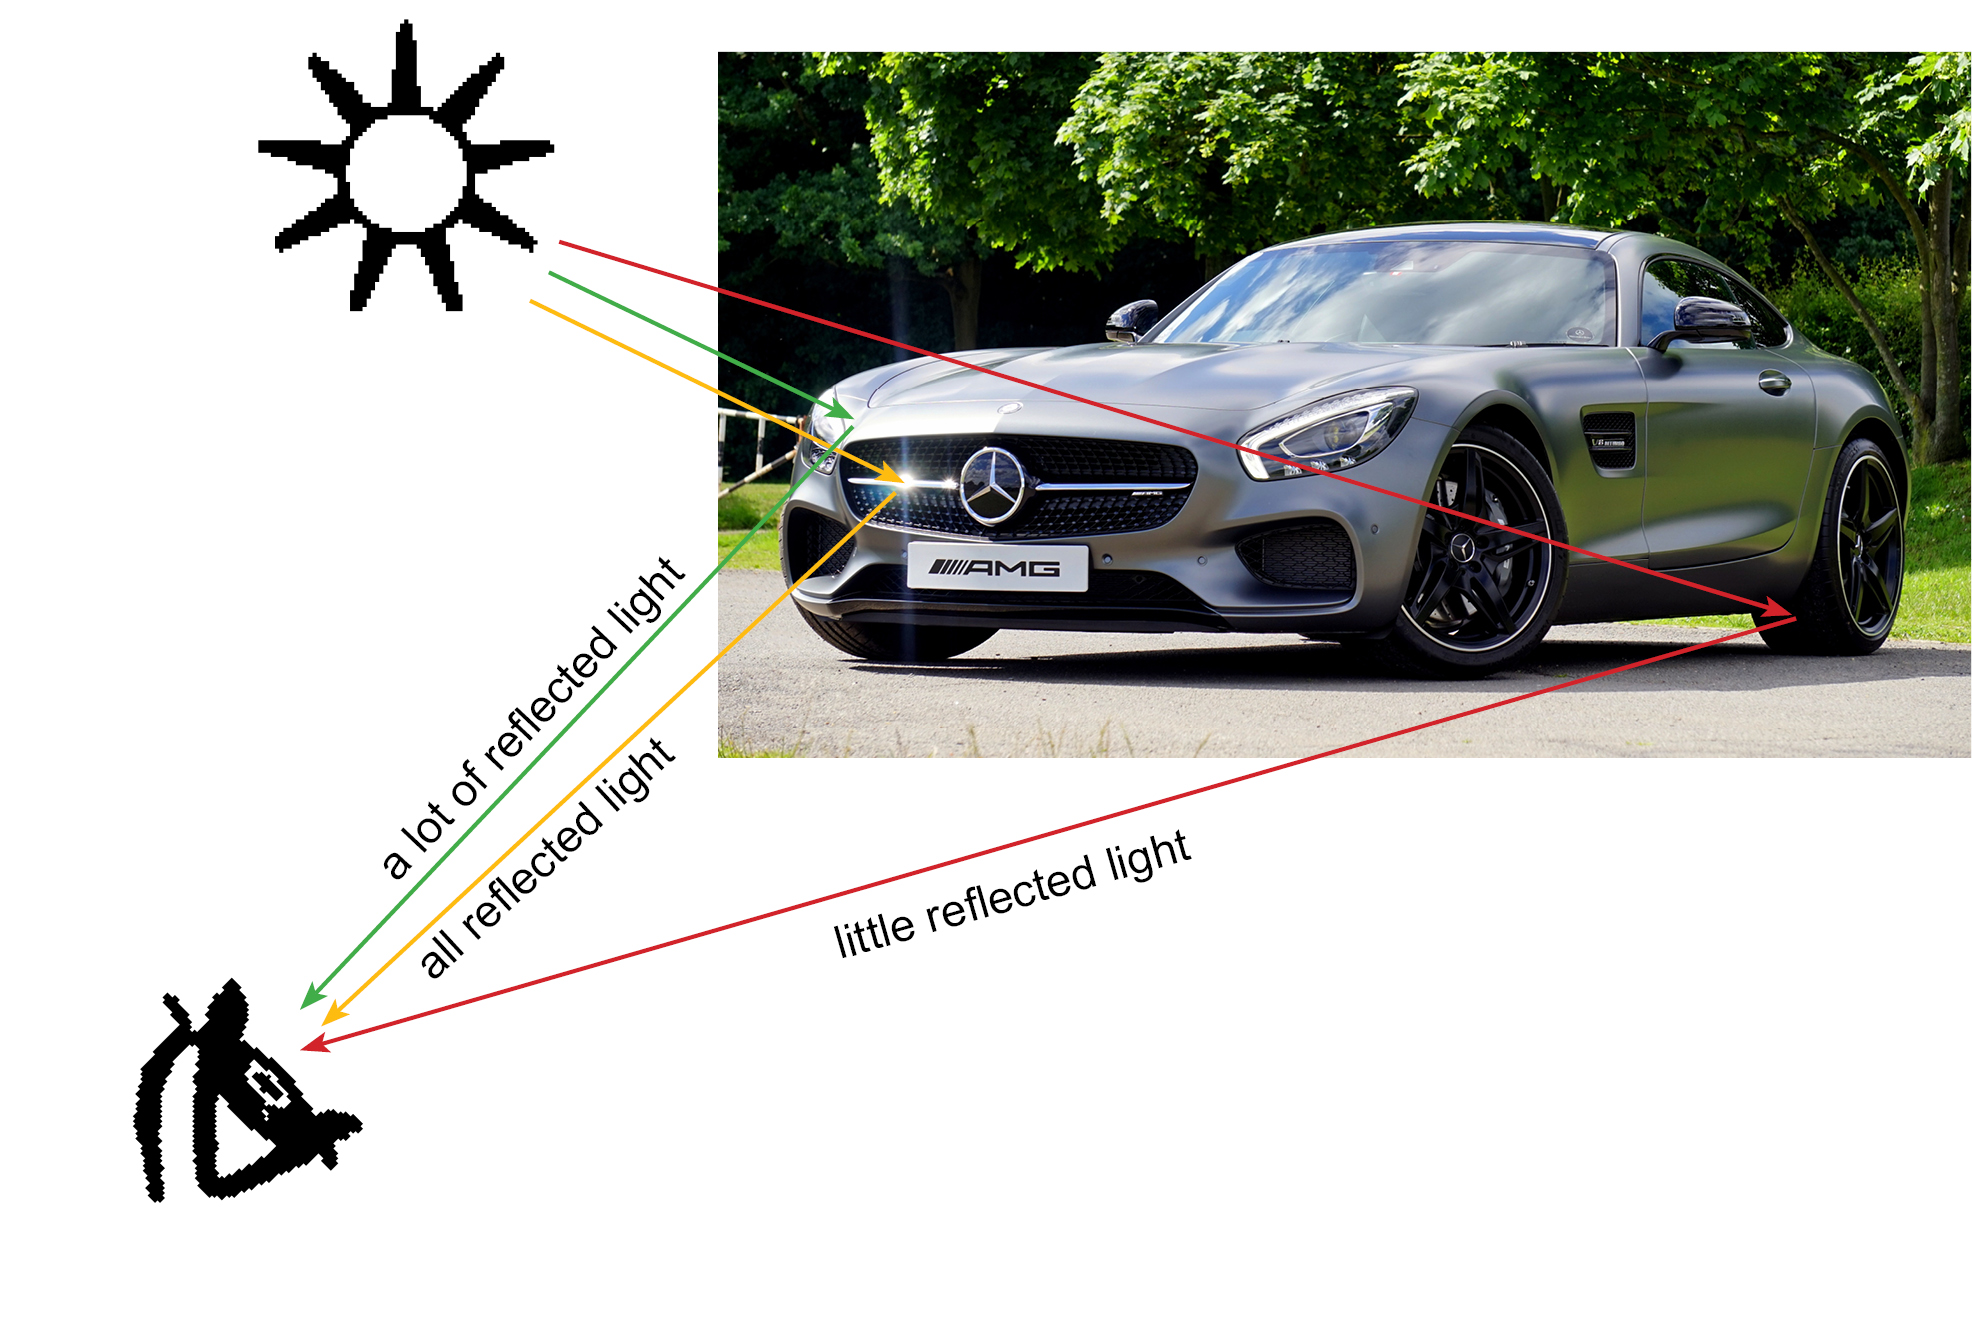
Blender’s developers used a very clever way that is at the heart of all 3D modeling programs. We know that objects in such programs are made up of faces. It is usually a flat quadrilateral that has an important property among others. Every face has a normal. It is a ray in the geometric sense that comes out of the face at right angles. This ray or rather its position in space serves as the basis for calculating the reflection of light from this face.
If the normal is directed away from the observer, the object does not reflect light and is black. If the normal is directed to the eye of the observer, then all the light that falls on it is reflected from the face. It turns out to be a glare. All other positions of normal define intermediate shades of the object’s color.
For this reason, our white color on the 3D model does not always turn out to be uniformly white.
Let’s continue painting our model. Let’s make the side with portholes red. Go to the Materials panel, select New and choose the color of the material.
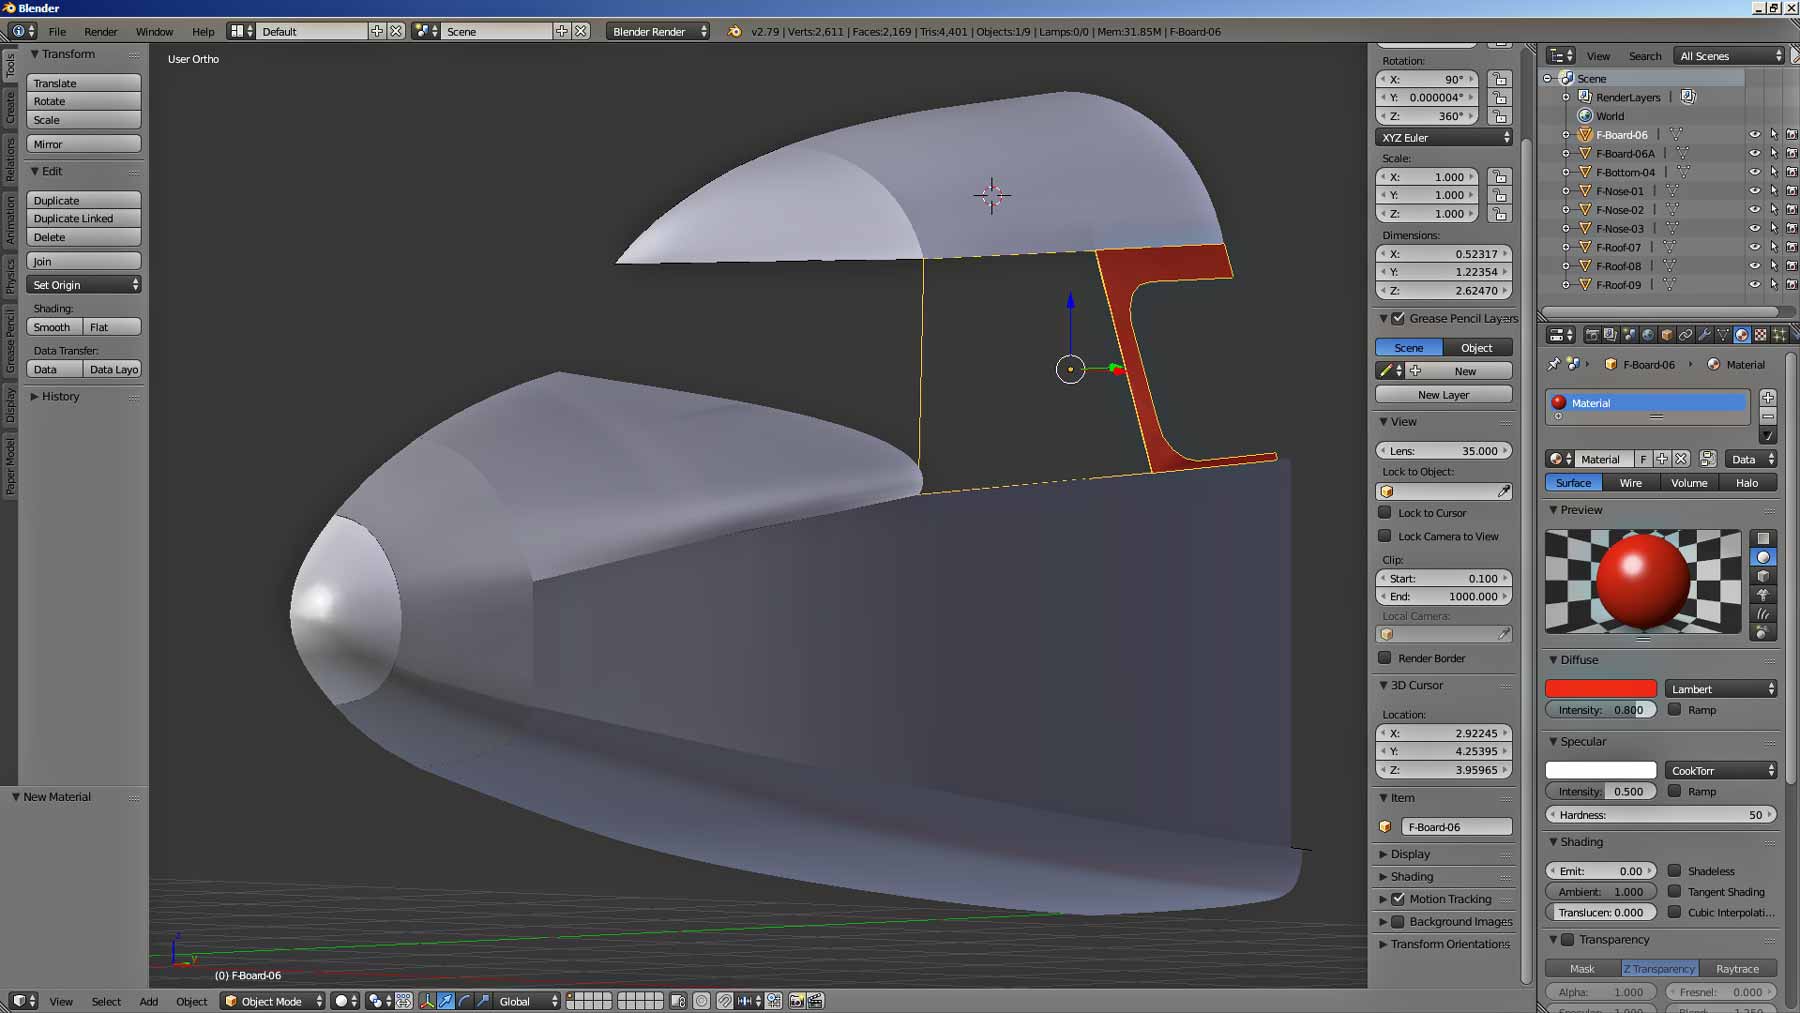
Paint the lower side white. Let the bottom of the hull be gray. Let the nose be white and blue. And to make it easier to see what color we used, put a light source in the scene. Let it be the sun.
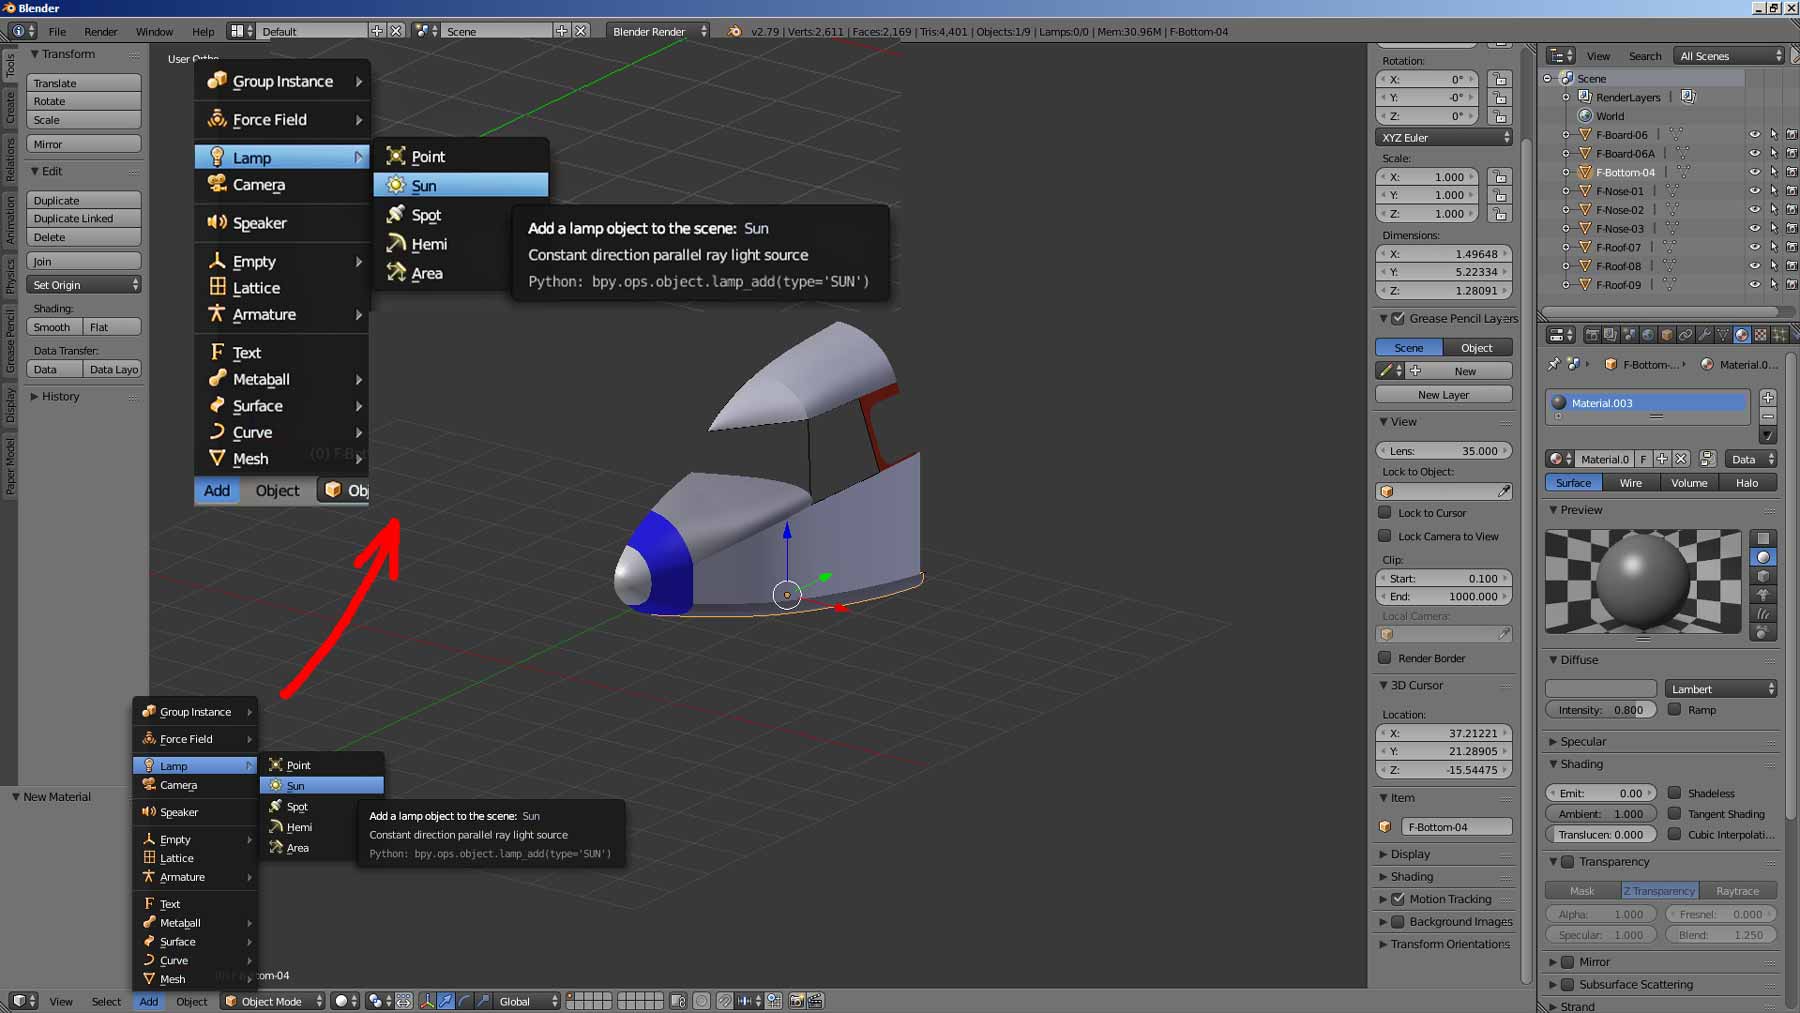
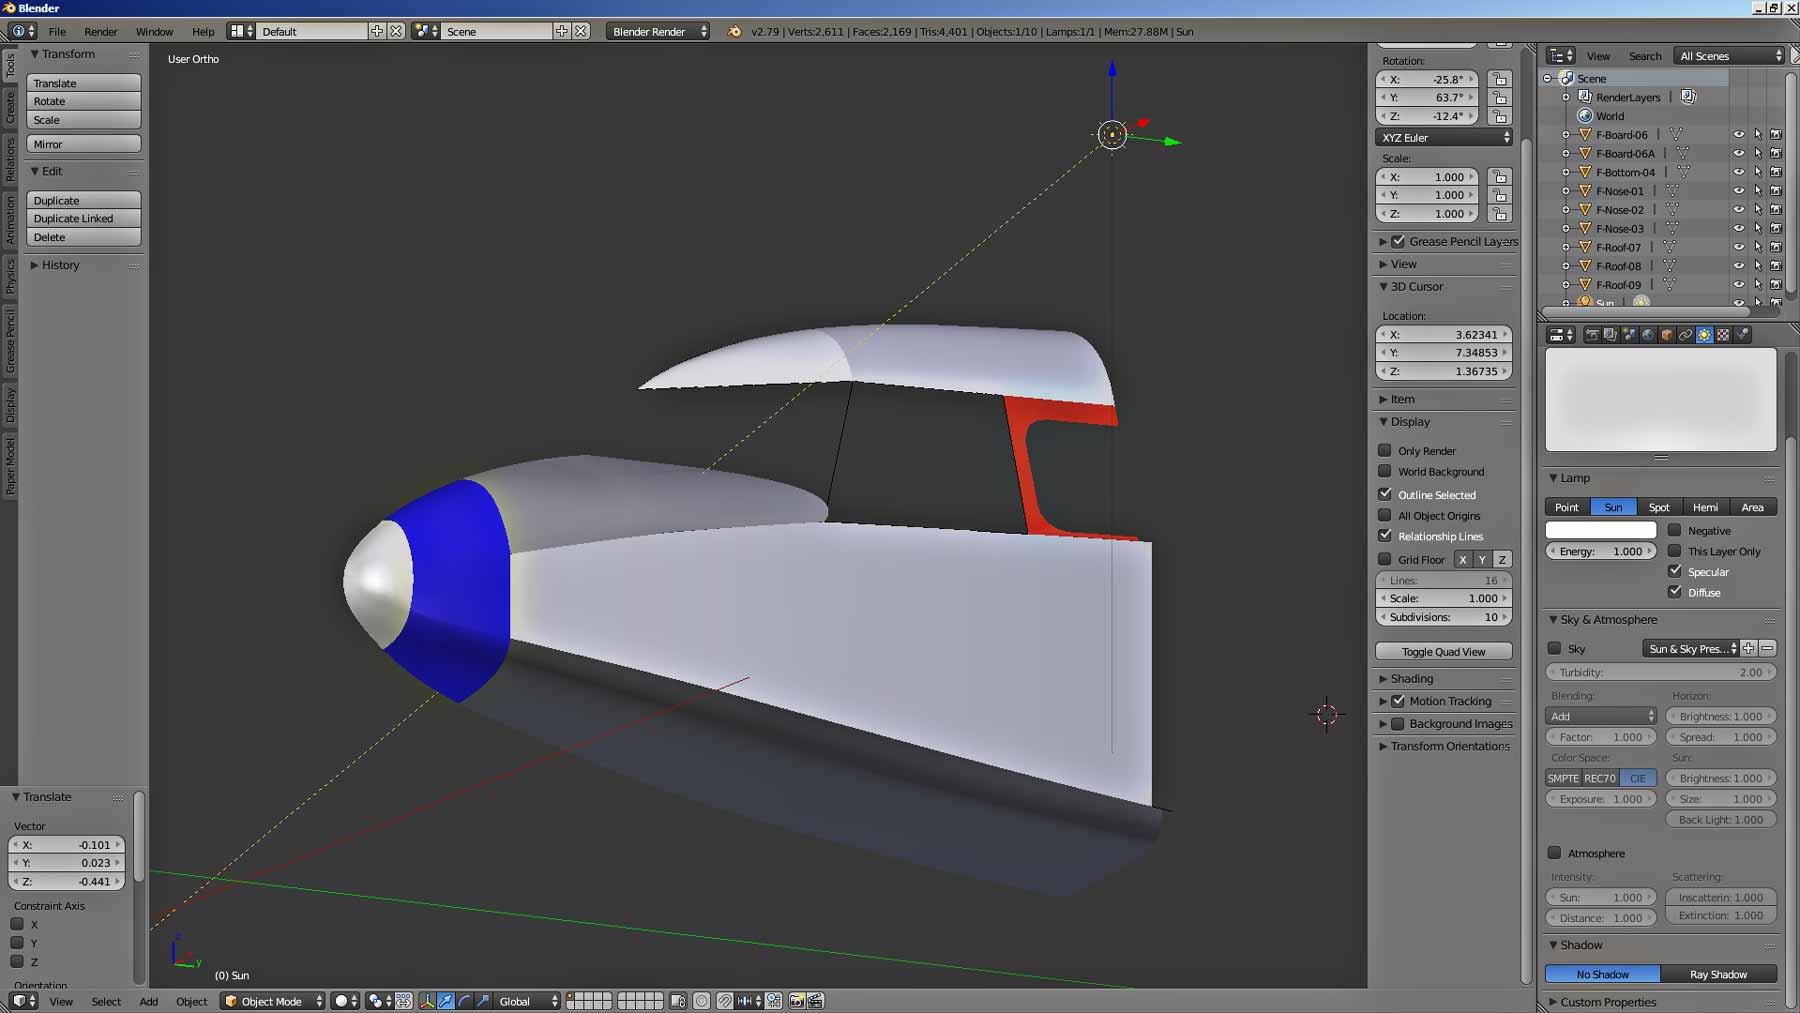
Let us direct the sun to our 3D model so that it illuminates the model well. To rotate the sun in the desired direction, use the Rotate command (R). In the Properties pane on the right side of the monitor, you will see the sun setting options. There you can change the brightness of the sun’s glow, its color and many other parameters. We need to deal with them later. Otherwise, too much information flow will obscure our goal from us – to paint the 3D model.
By unrolling the sun beam, achieve bright lighting of the 3D model.
Only the fuselage part in front of the cockpit remained unpainted. It is usually painted black. But not completely, but partially. Therefore, the question arises of how to paint the part partially. To do this, add one more color to the previously selected part of the part in the material panel. Let’s see how you can do this.
Paint the panel in front of the cockpit white. You already know how to do this.
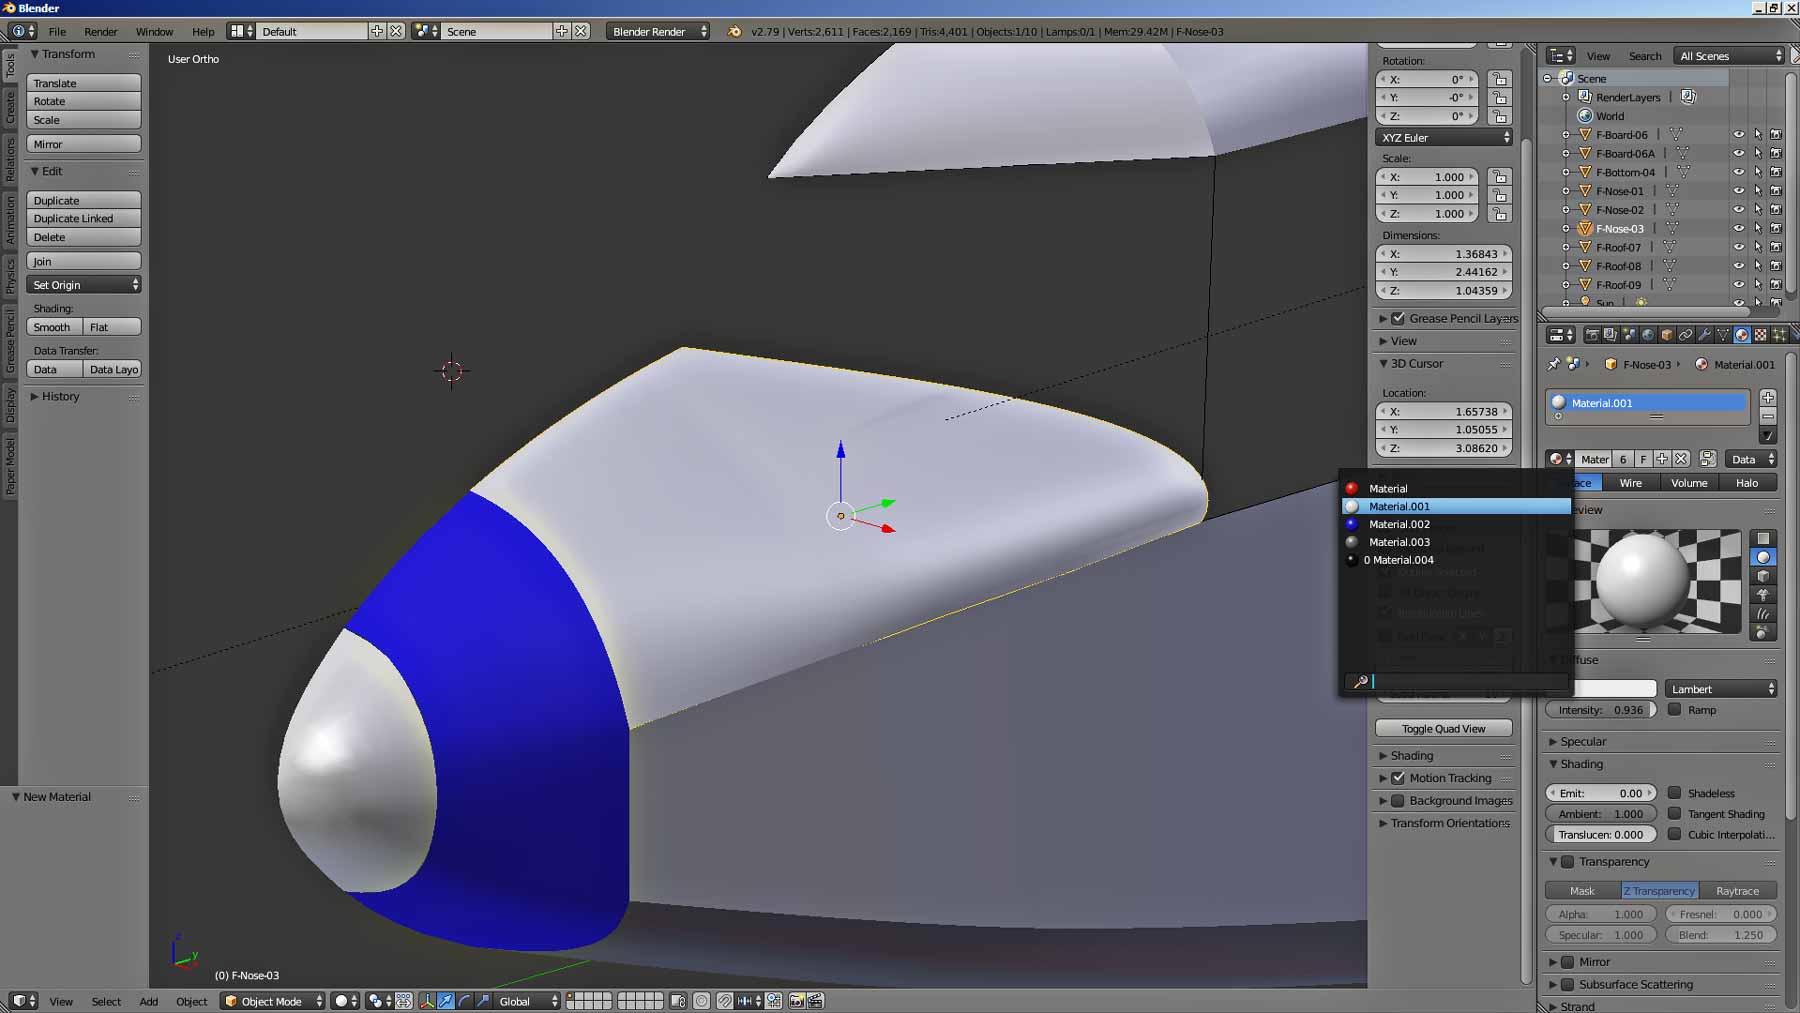
Then add a black material. This can be done by first painting the panel in front of the cockpit black and then assigning it white. As a result, the black color Material.004 will appear in the list of materials.
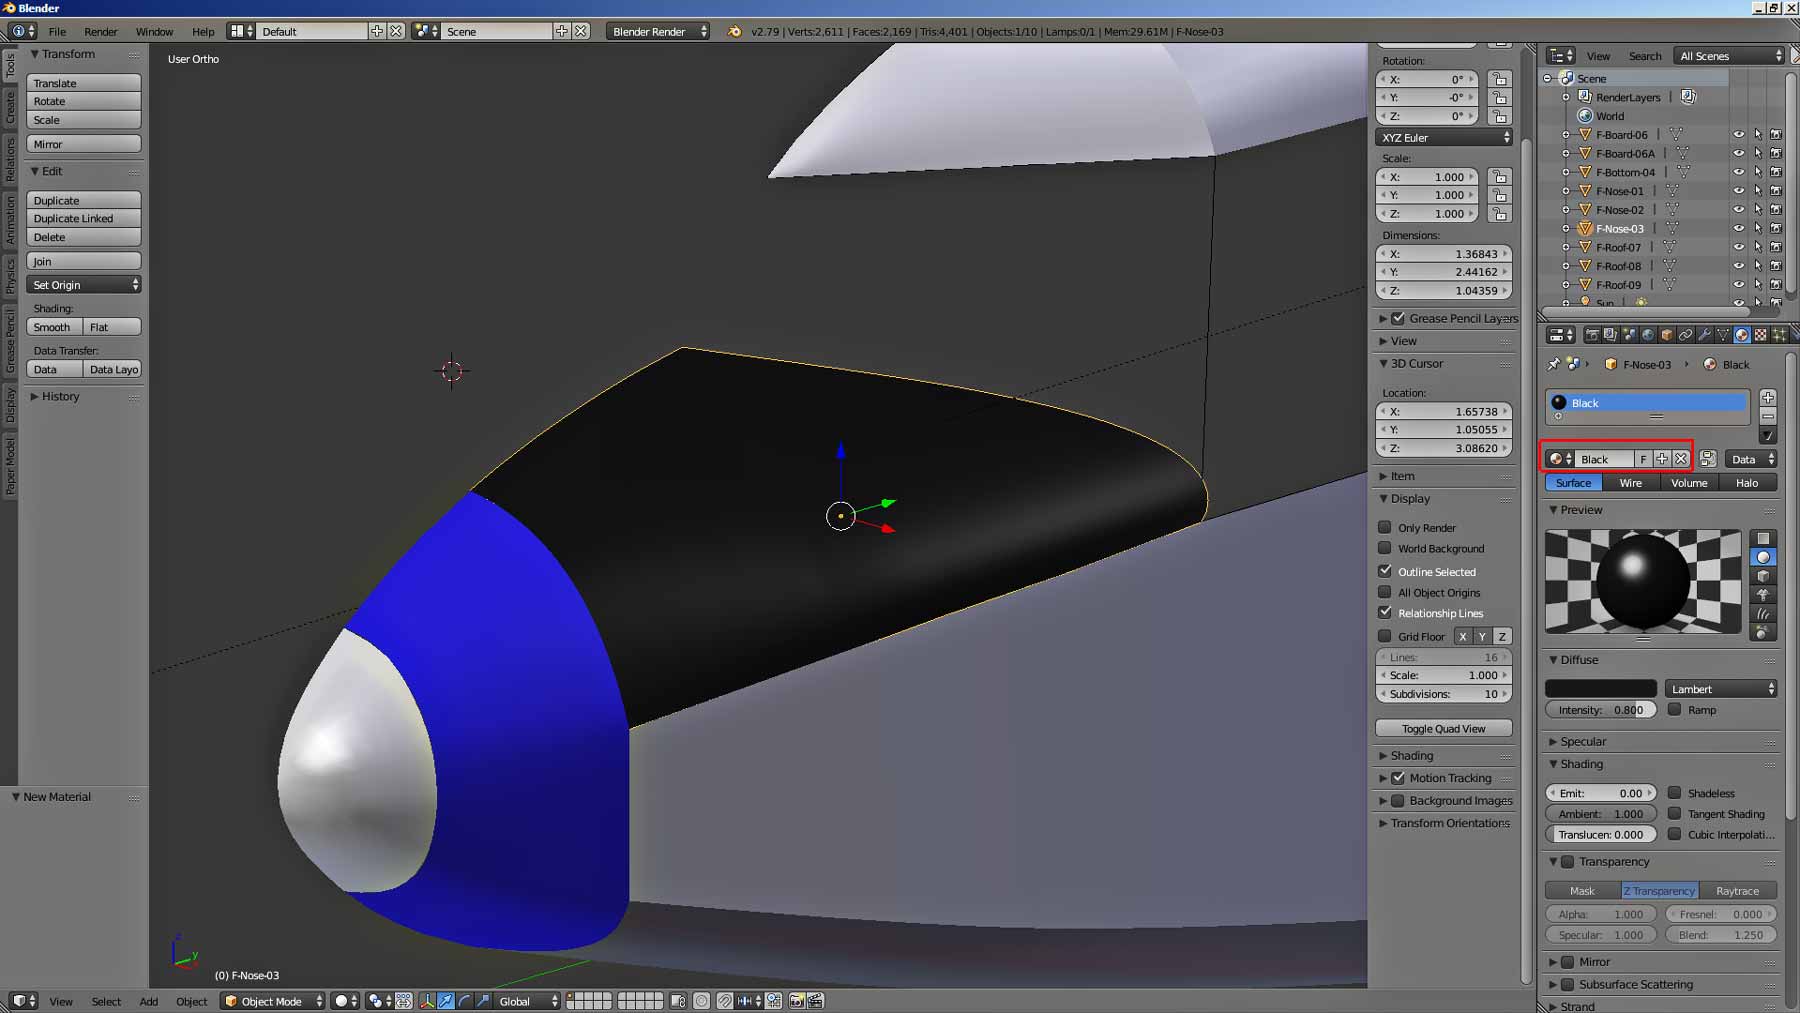
By the way, we can rename our materials. Let’s do it with black material. Let’s select it. The panel in front of the cockpit will turn black again. Rename the material in the panel window above the Preview panel.
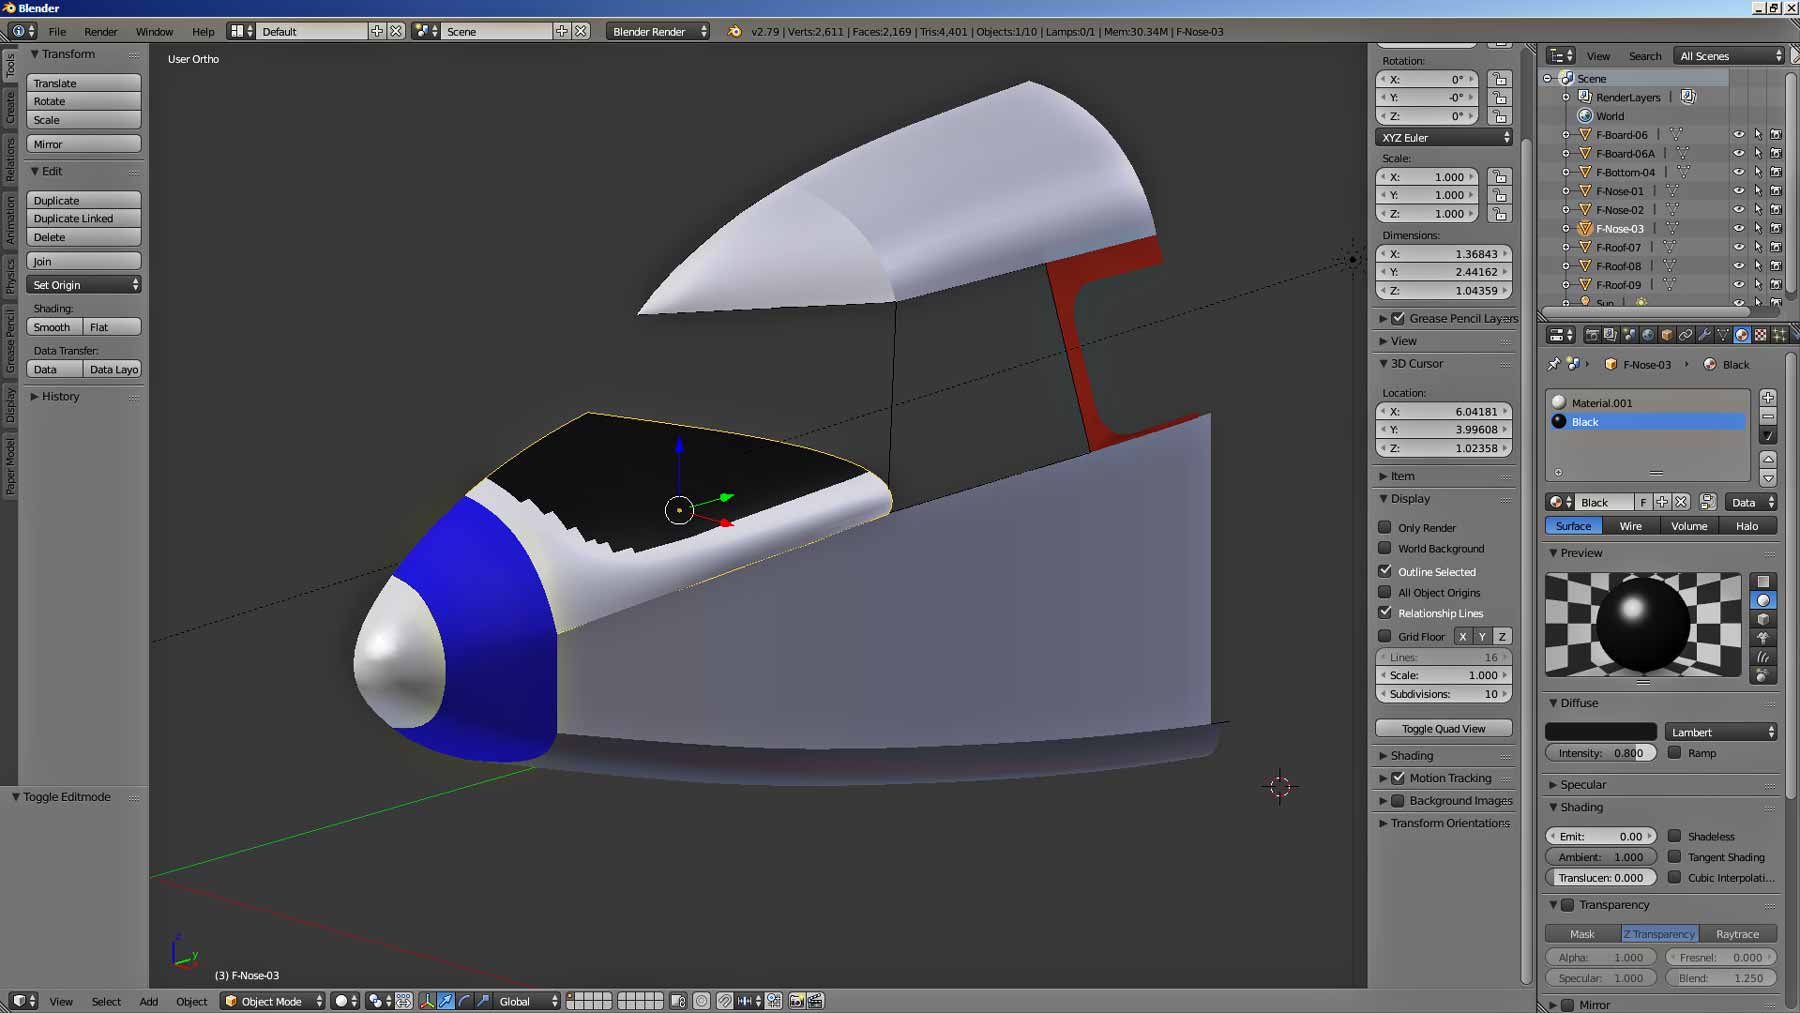
Select the panel in front of the cockpit and press the Tab button.
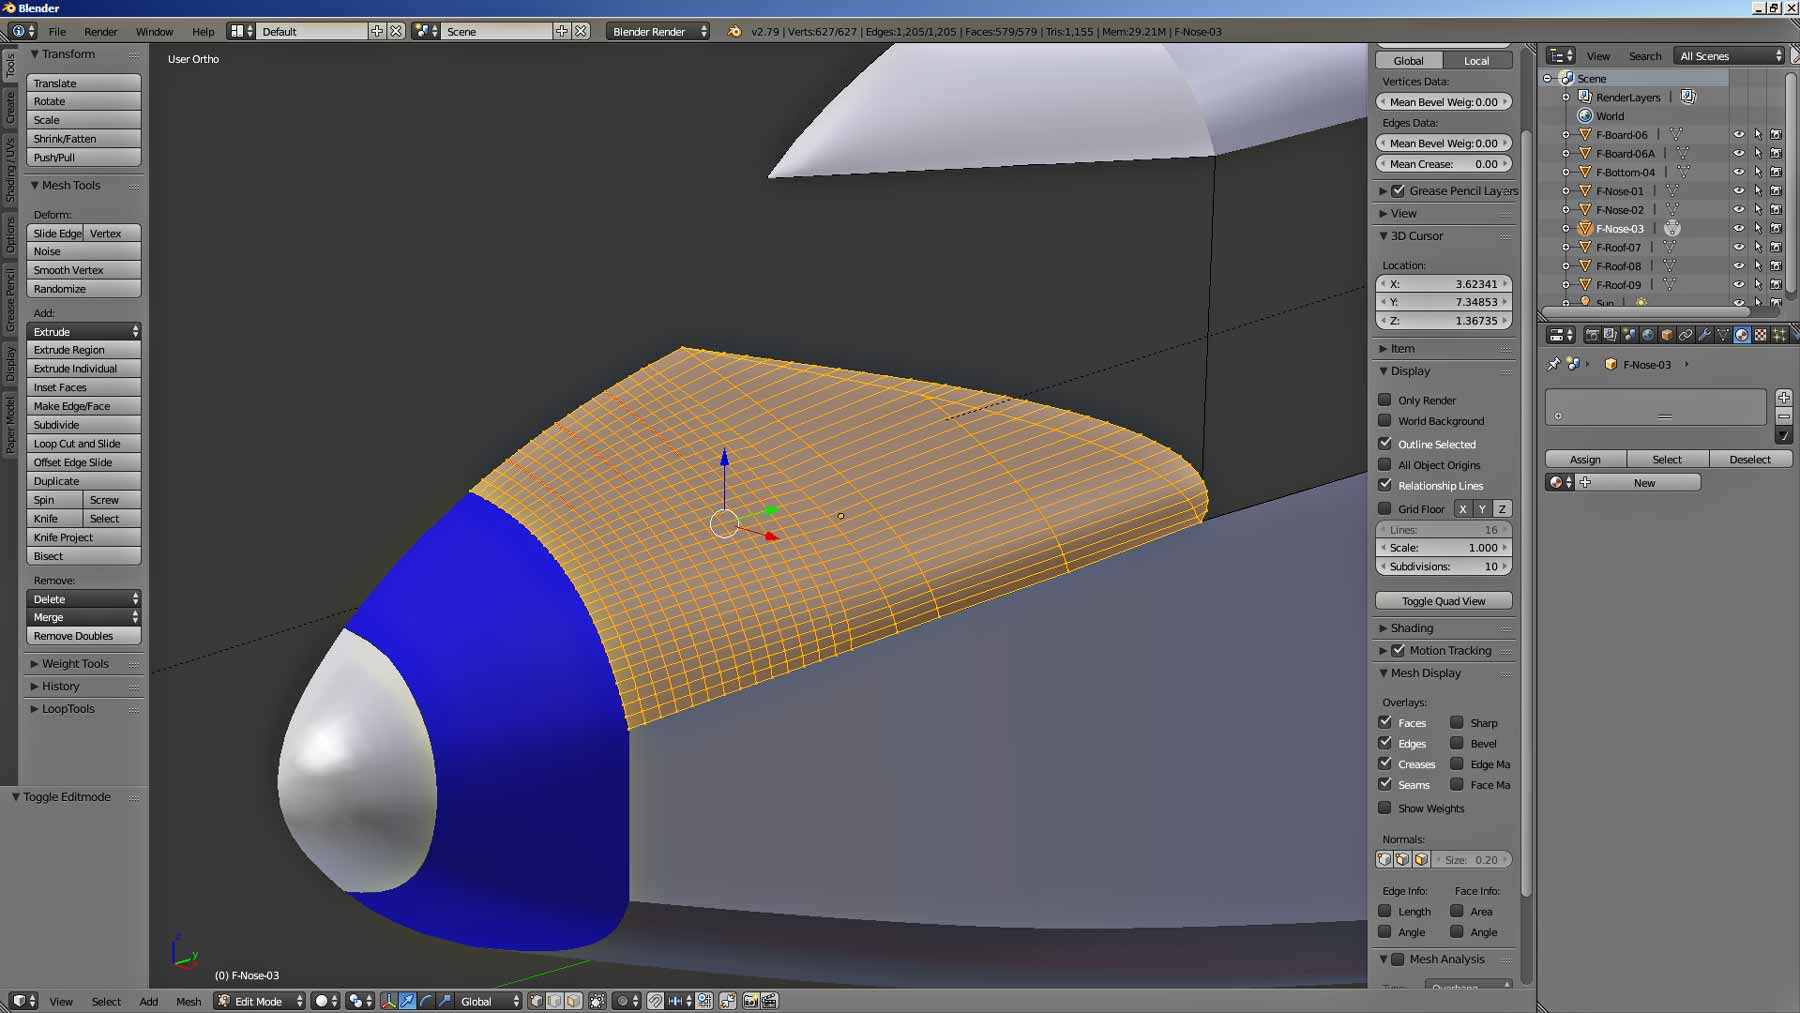
We will go into object editing mode, and then we need to select the area of the part that we want to paint in a different color.
The shape of the highlighted area is ugly. But now we will not dwell on how to cut a part with a smooth curve from a whole part. This can be done, but so that we do not get confused, we will not do this for now.
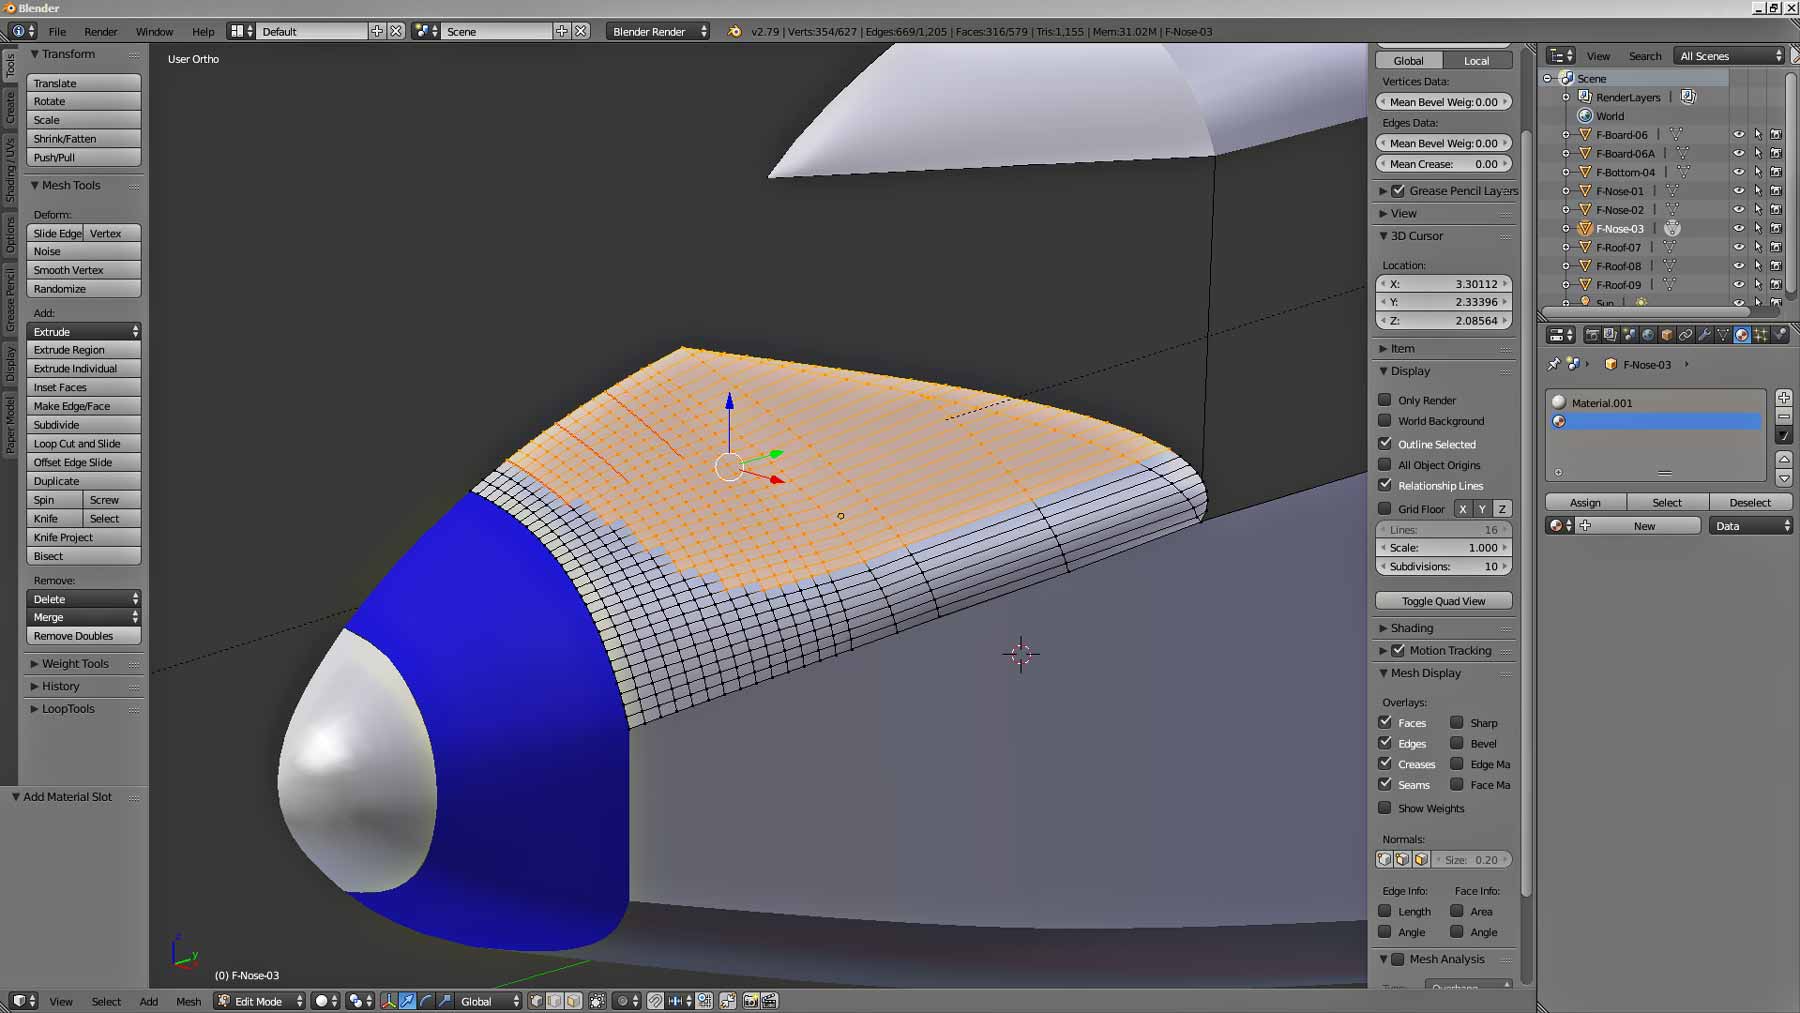
Go back to the Materials panel and find the plus and minus panel above the New button. This panel adds color to the selected areas of the object. Click on the plus.

Another material will appear in this window. But he has not yet been appointed. Let’s assign it. To do this, left-click on the New button if you want to select a new material, or on the arrow button to select an existing material from the list.
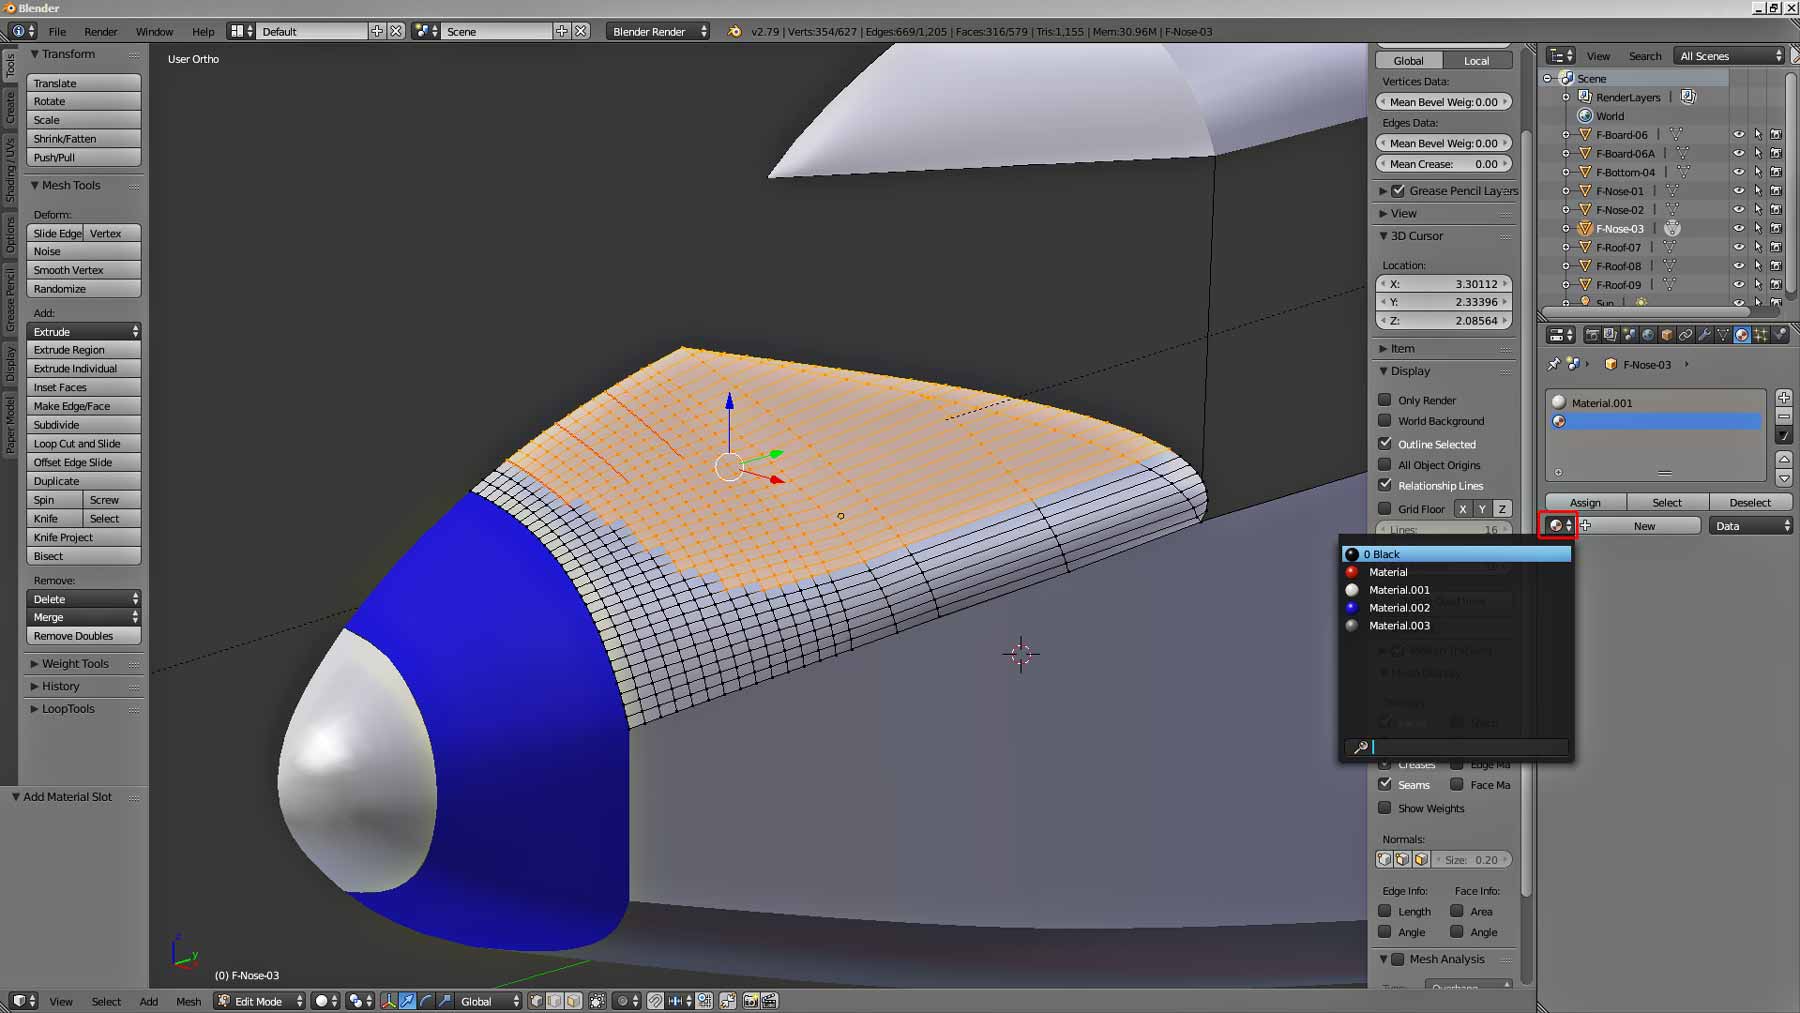
Let’s choose a black material. It will appear in the list under the white material that we painted our panel with. But in order for it to become visible on the monitor, you must press the Assign button.
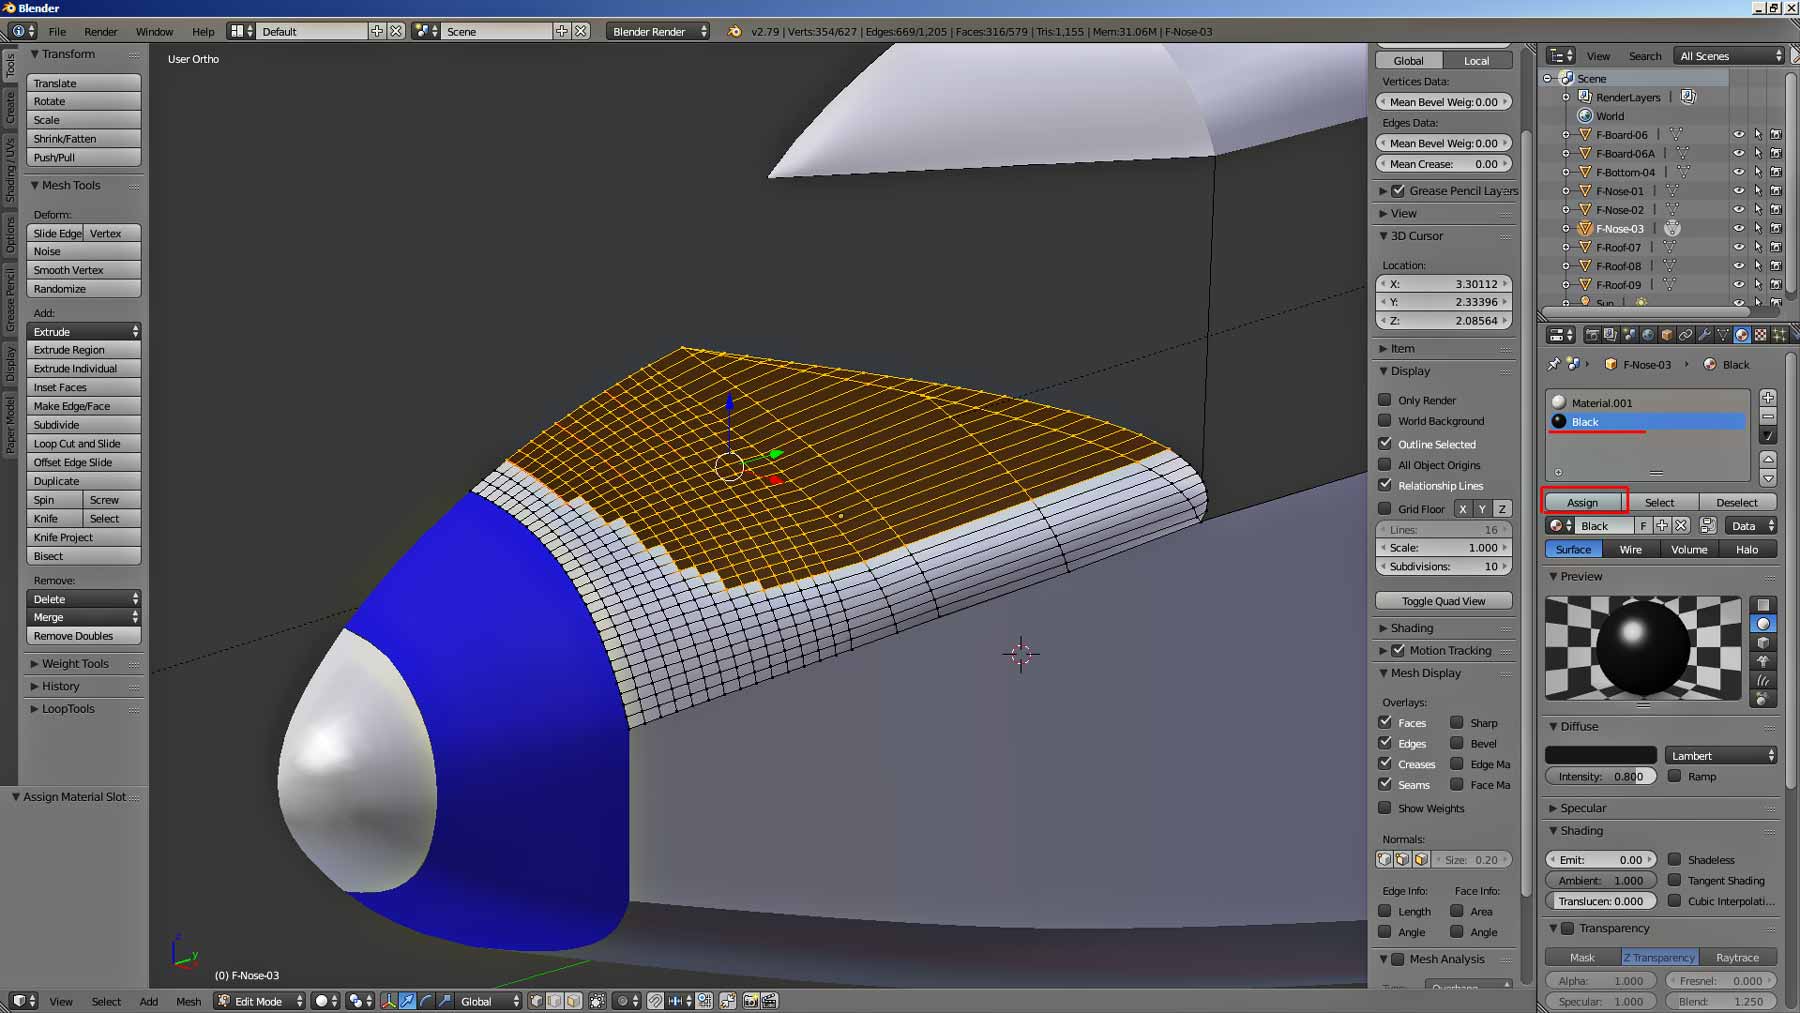
That’s it. The work is done. We partially painted the panel in front of the cockpit. The action is simple, much more difficult to describe. I hope I wrote it more or less clearly, despite my poor English.
Then we’ll look at how to paint the part smoothly. To do this, we will cut it with a smooth curve.
Let’s also look at how to make the material matte or shiny. You can do it yourself, though, if you take a close look at the Materials panel.