There is no need to prove that a good model needs beautiful and high-quality photographs in order to present the model to colleagues in all its qualities.
However, as I already said, it is not always possible to take a simple photo of a model using a phone or even a camera. As a rule, the ends of the model are blurry and not sharp in the pictures.
What can you do about it?
Smart people have long ago solved this problem, and we can only learn from their experience and repeat it.
Experience suggests that there are basically two ways of shooting with respect to models. This is a side shot and shot in depth shot.
Consider today a “side view”, or as it is called panoramic photography. This is when the model stands sideways to you, and you shoot it in parts simply by turning the camera on a tripod or even just holding it in your hands.
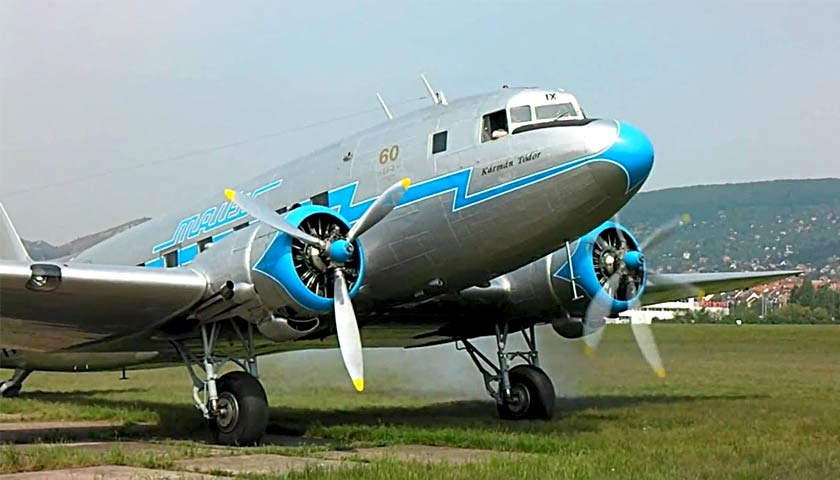
I made such shots once while walking around the city during a summer parade of warships on our river. I pushed through the crowd my way to the very edge of the embankment and suddenly remembered about this method of shooting objects that do not completely fit in the camera frame.
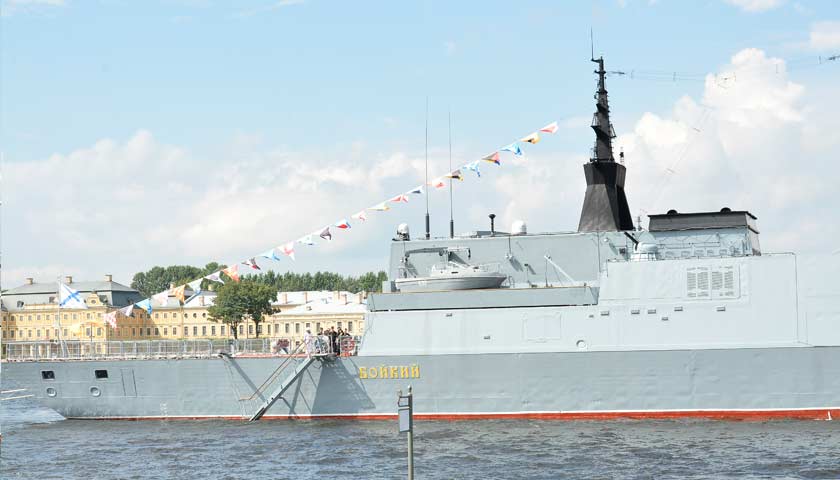
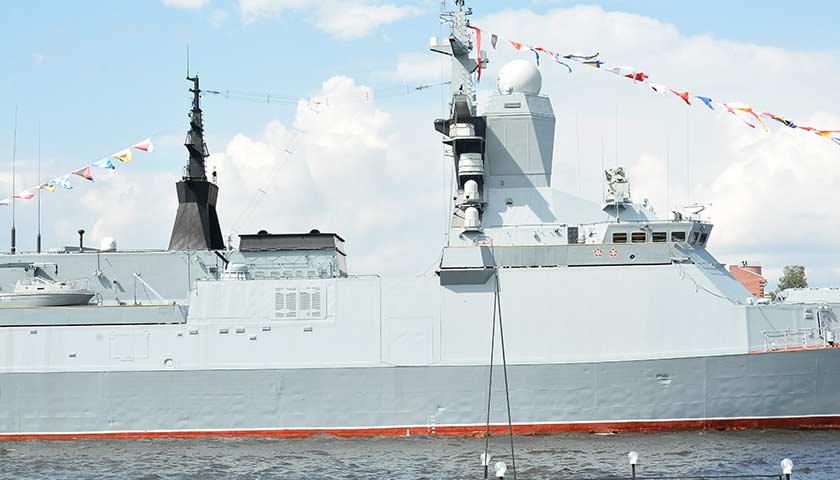
In front of me was a warship. From where I was, I couldn’t take a picture of it in its entirety. I didn’t have a tripod with me. I took my camera in hand and, turning with my whole body, took three pictures of the ship. I tried to guide the camera horizontally and as accurately as possible.
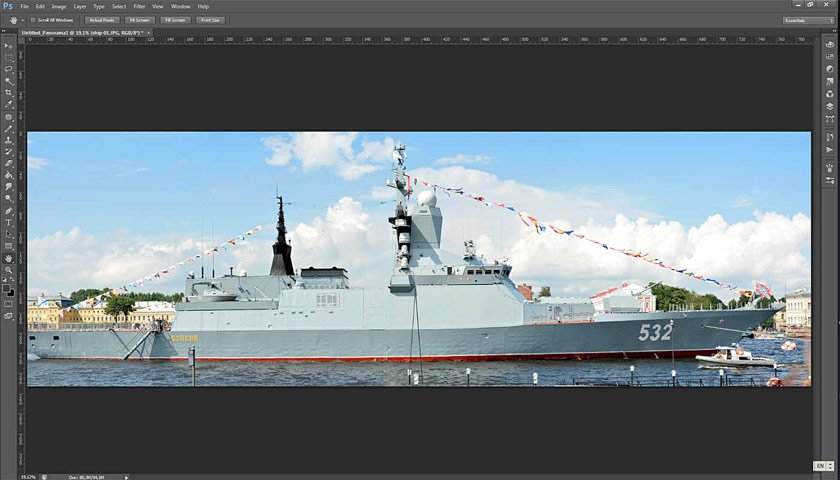
When I got home, I transferred the three images I got to my laptop. Now it was up to Photoshop. This amazing program has a wonderful tool that allows you to make one the full shot from several panoramic shots. The program itself, in an unknown way, splices the images and the result is one large and clear image.
Then I did this: I opened Photoshop and selected the File tab, the Automate – Photomerge item.
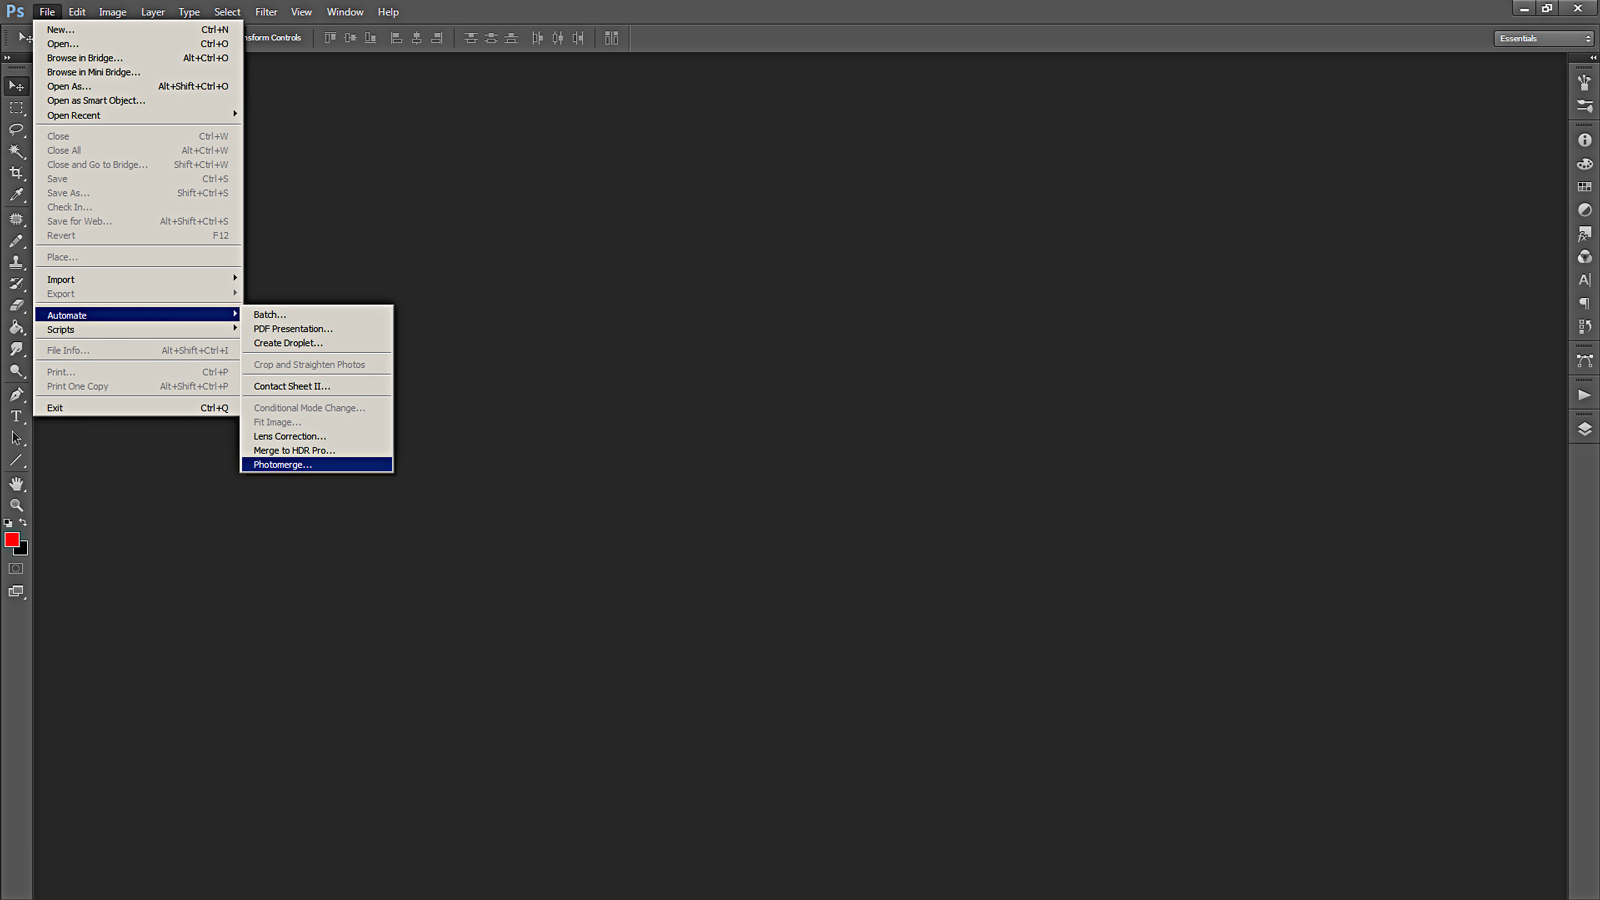
We get into the window for selecting images and the method of connecting them.

Then we select the files. I chose the ones that I made when I was at the walk. File merge method Cylindrical. I put crosses in the checkboxes to improve the quality of the resulting image.
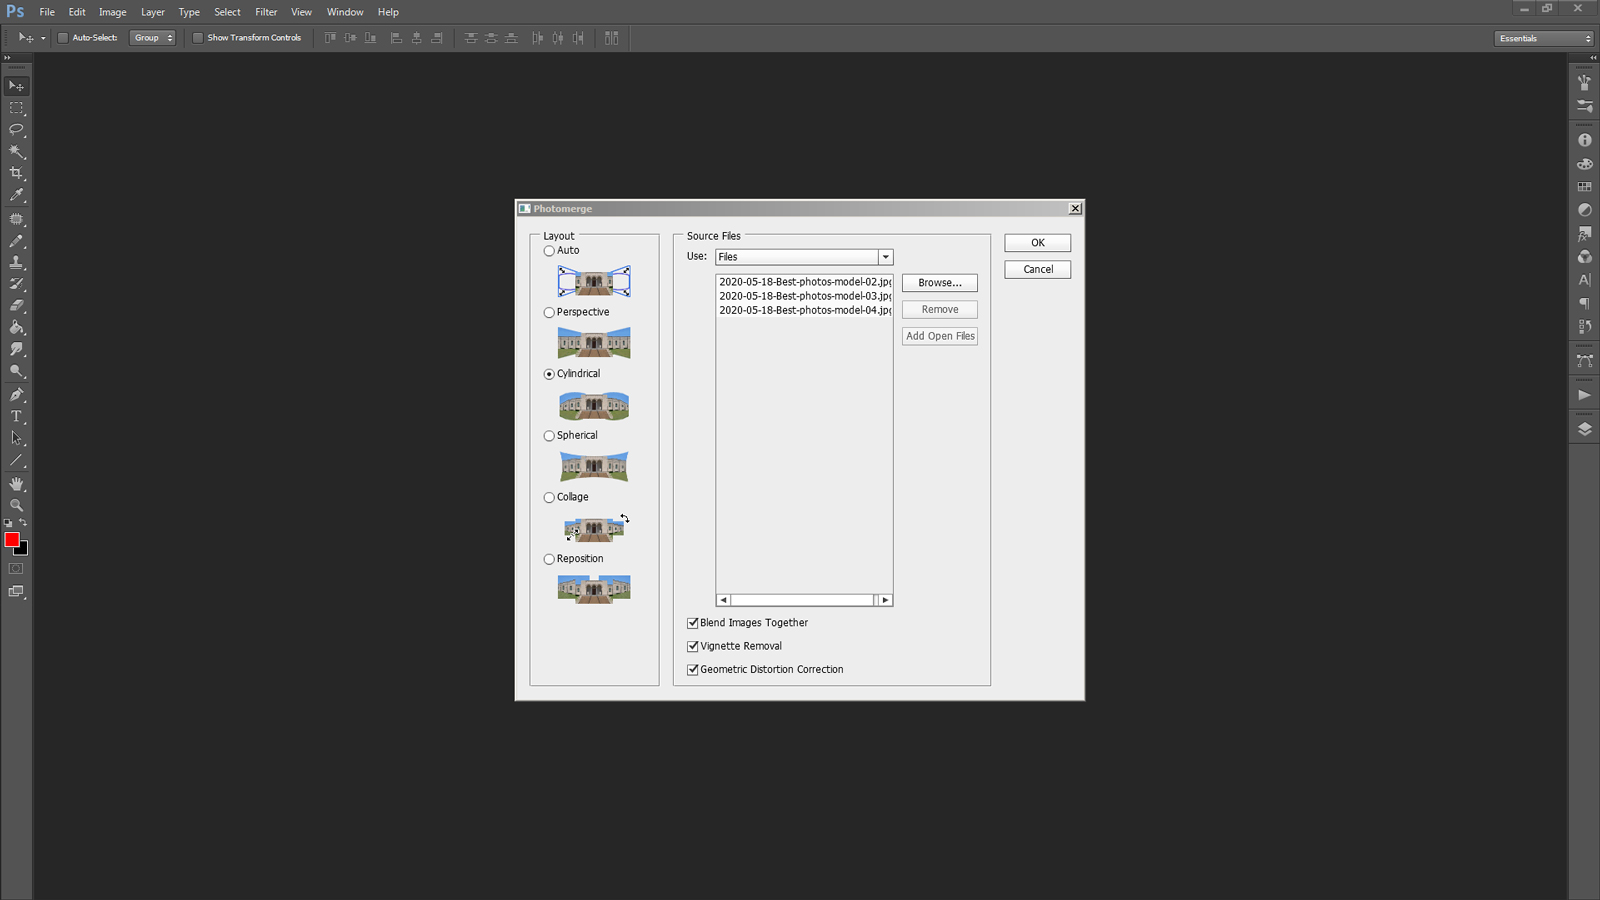
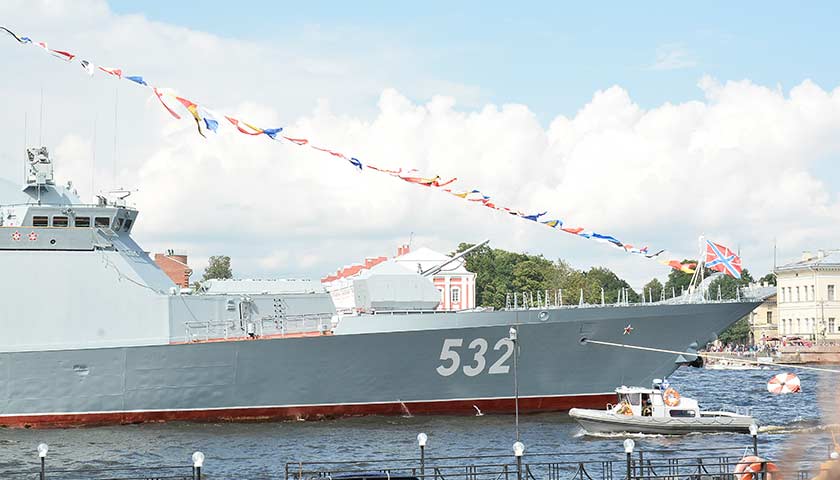
I press the OK button. Next comes Photoshop. After a few seconds, he collects my three separate shots into his one. Here’s what I got.
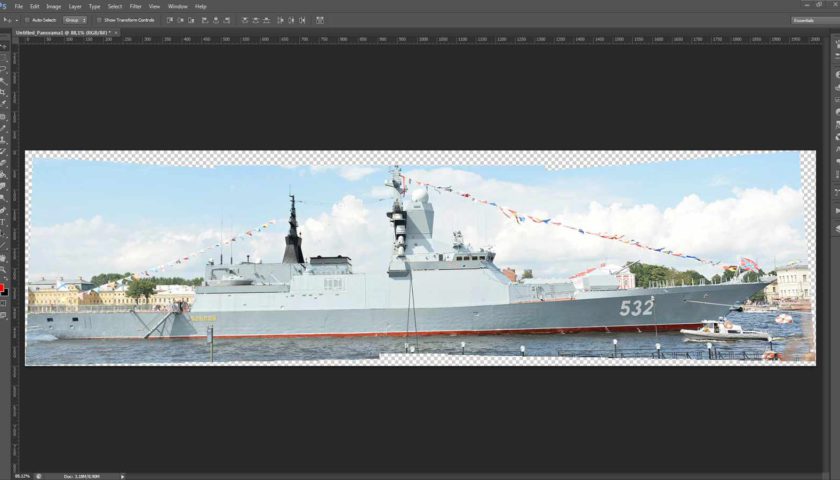
Great result! We look closely. I cut off the top of the ship’s mast and some aft. This is a note for the future. You should always leave fairly wide margins around the object being shot in the picture so that important details are not lost during processing on a computer.
Overall, the result is very good. It seems that the picture was taken in one frame, the places where Photoshop combined the photos are invisible. You can even remember at the next shooting, try to divide the object so that at the places of future joints there are no characteristic details that may not be joined very well by the program.
Now you place the ship “on an even keel”, crop the edges of the frame to make them even, and add a little light and color to the frame. This will make the colors richer and the whole image more attractive. I also added a part of the mast which had been cutted off.

In general, try this method on your model. You will be able to get a large and high-quality photo that you can put on a magazine cover or even make a poster.